VC teams often need an efficient way to forward emails and ensure they are accurately added to their CRM, like Affinity. This guide outlines how to set up the automation in Zapier using an Email Parser and Formatter.
Step 1: Set Up the Email Parser Trigger
-
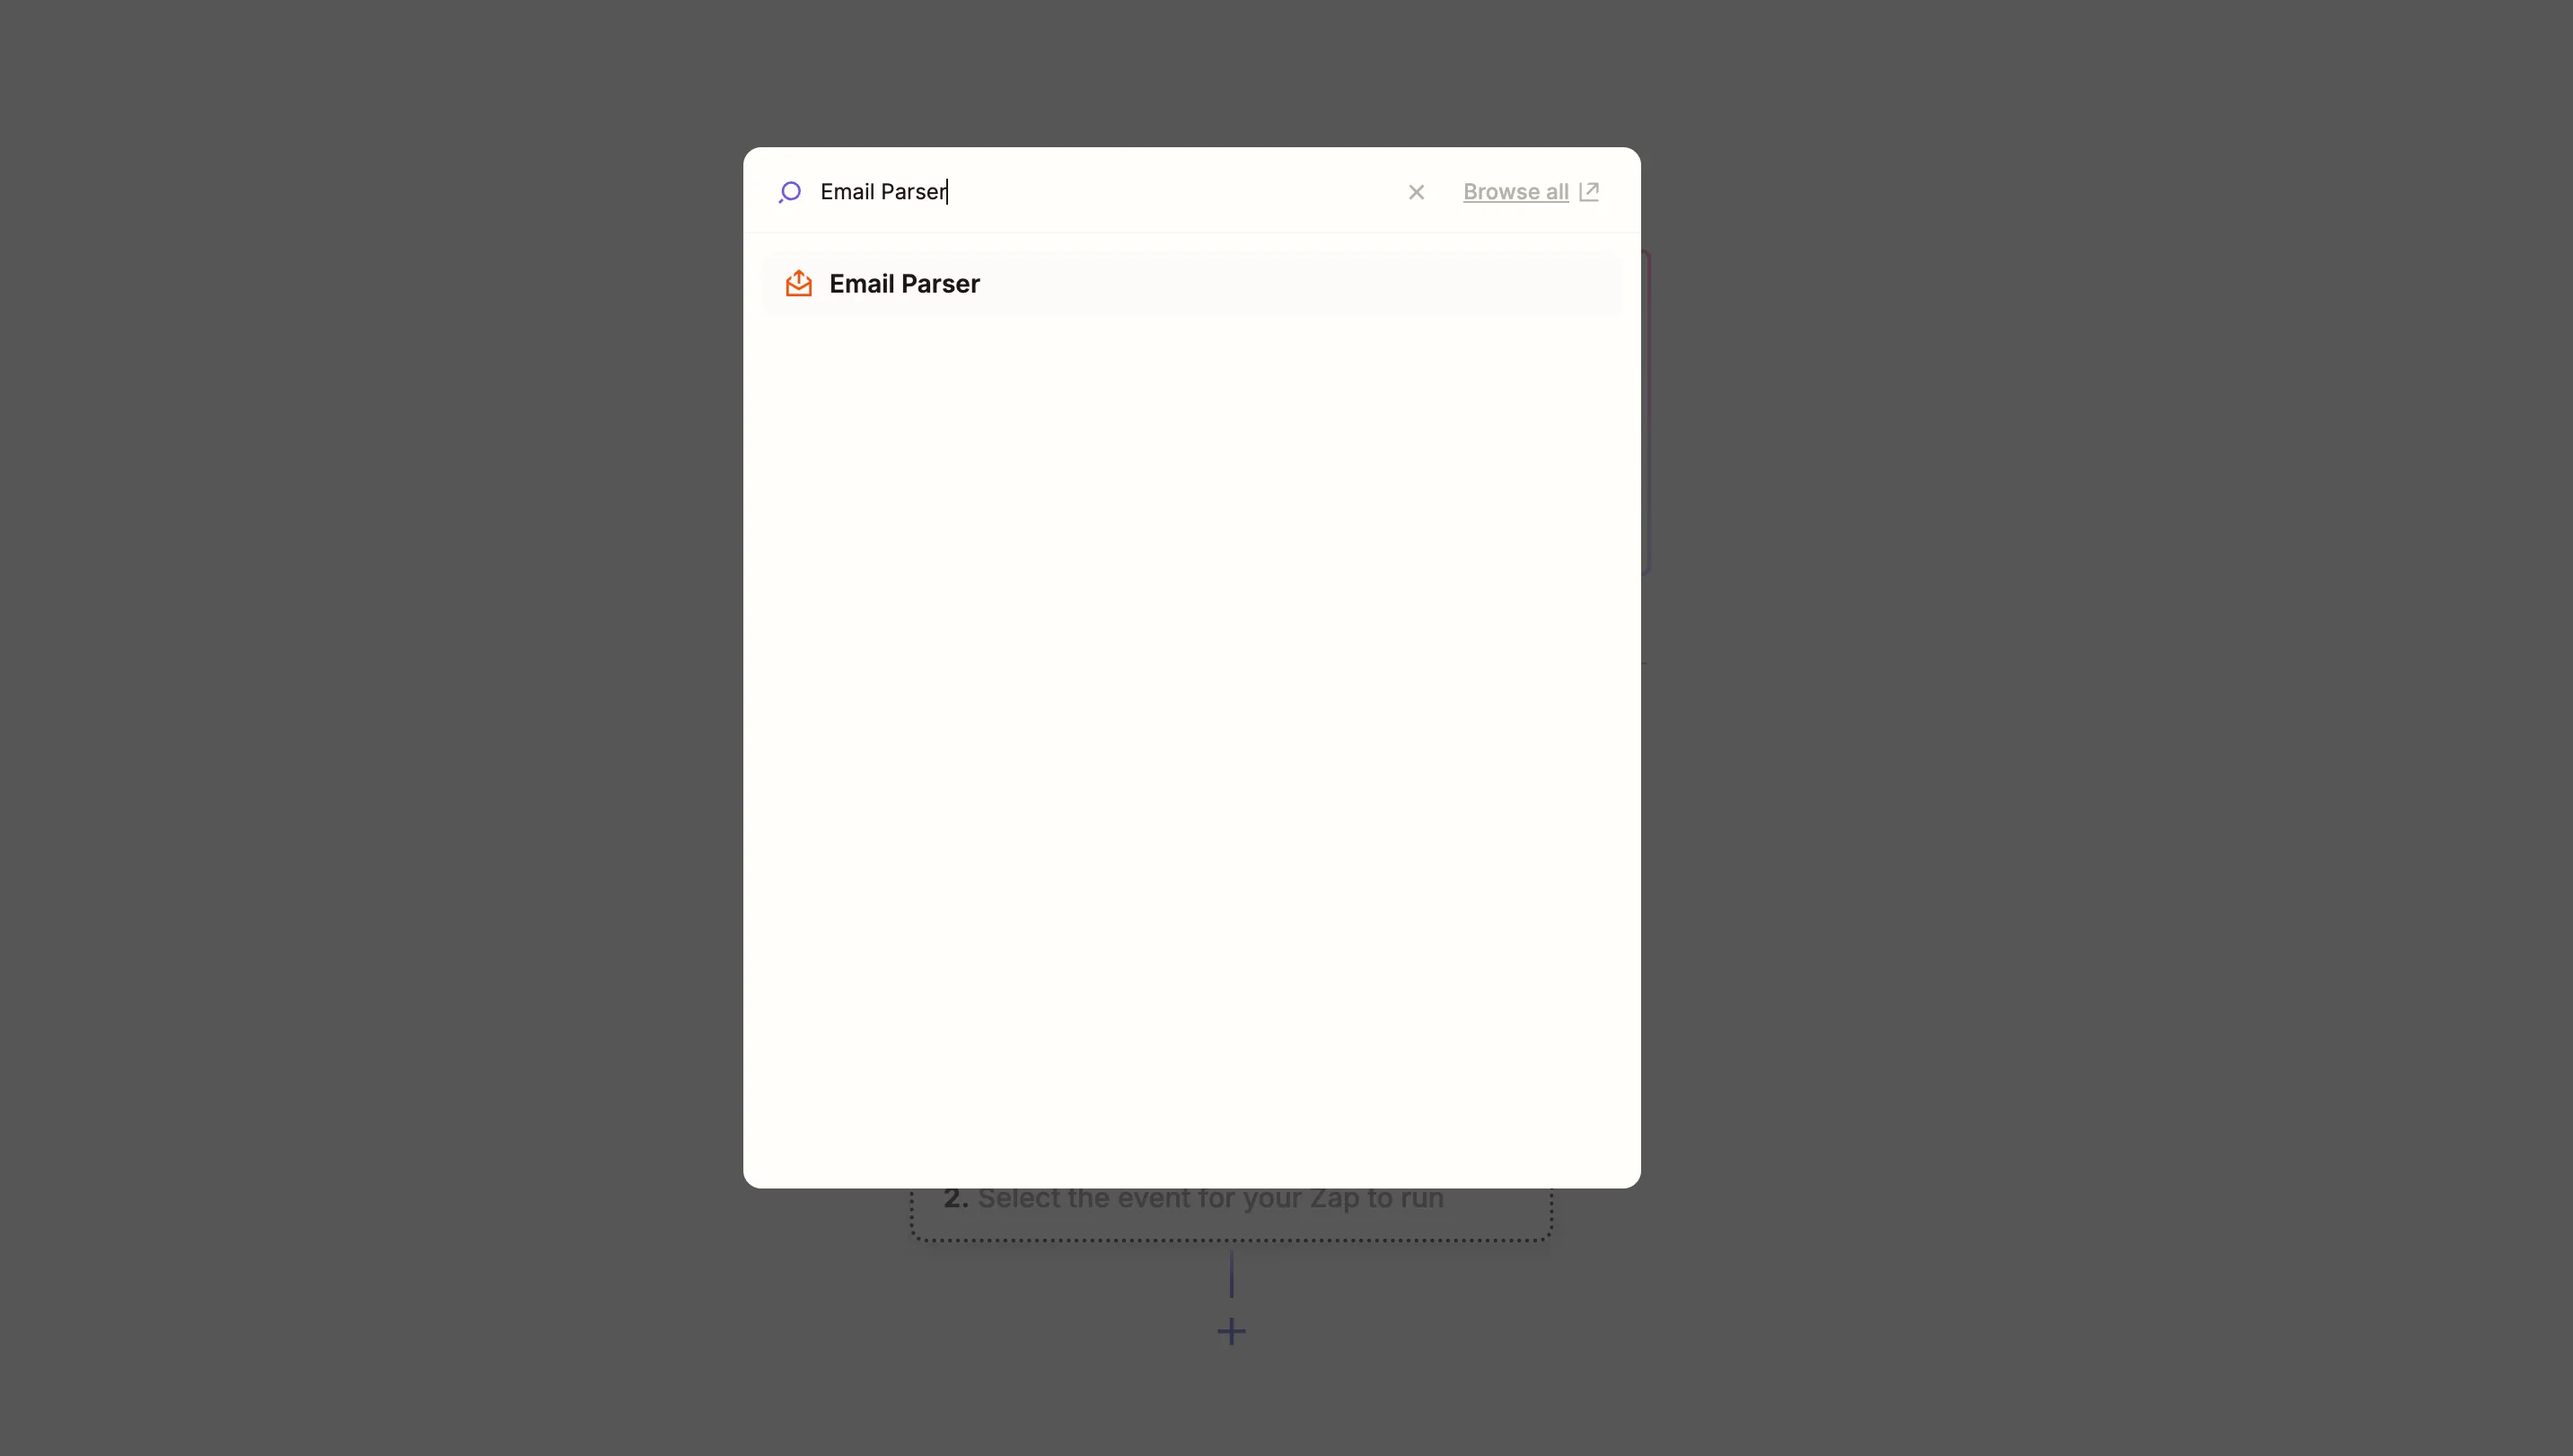
Select “Email Parser by Zapier” as the Trigger App
- Start by searching for Email Parser by Zapier in the Zap editor.
- Set the trigger event to New Email.
- Connect your Email Parser account.
-
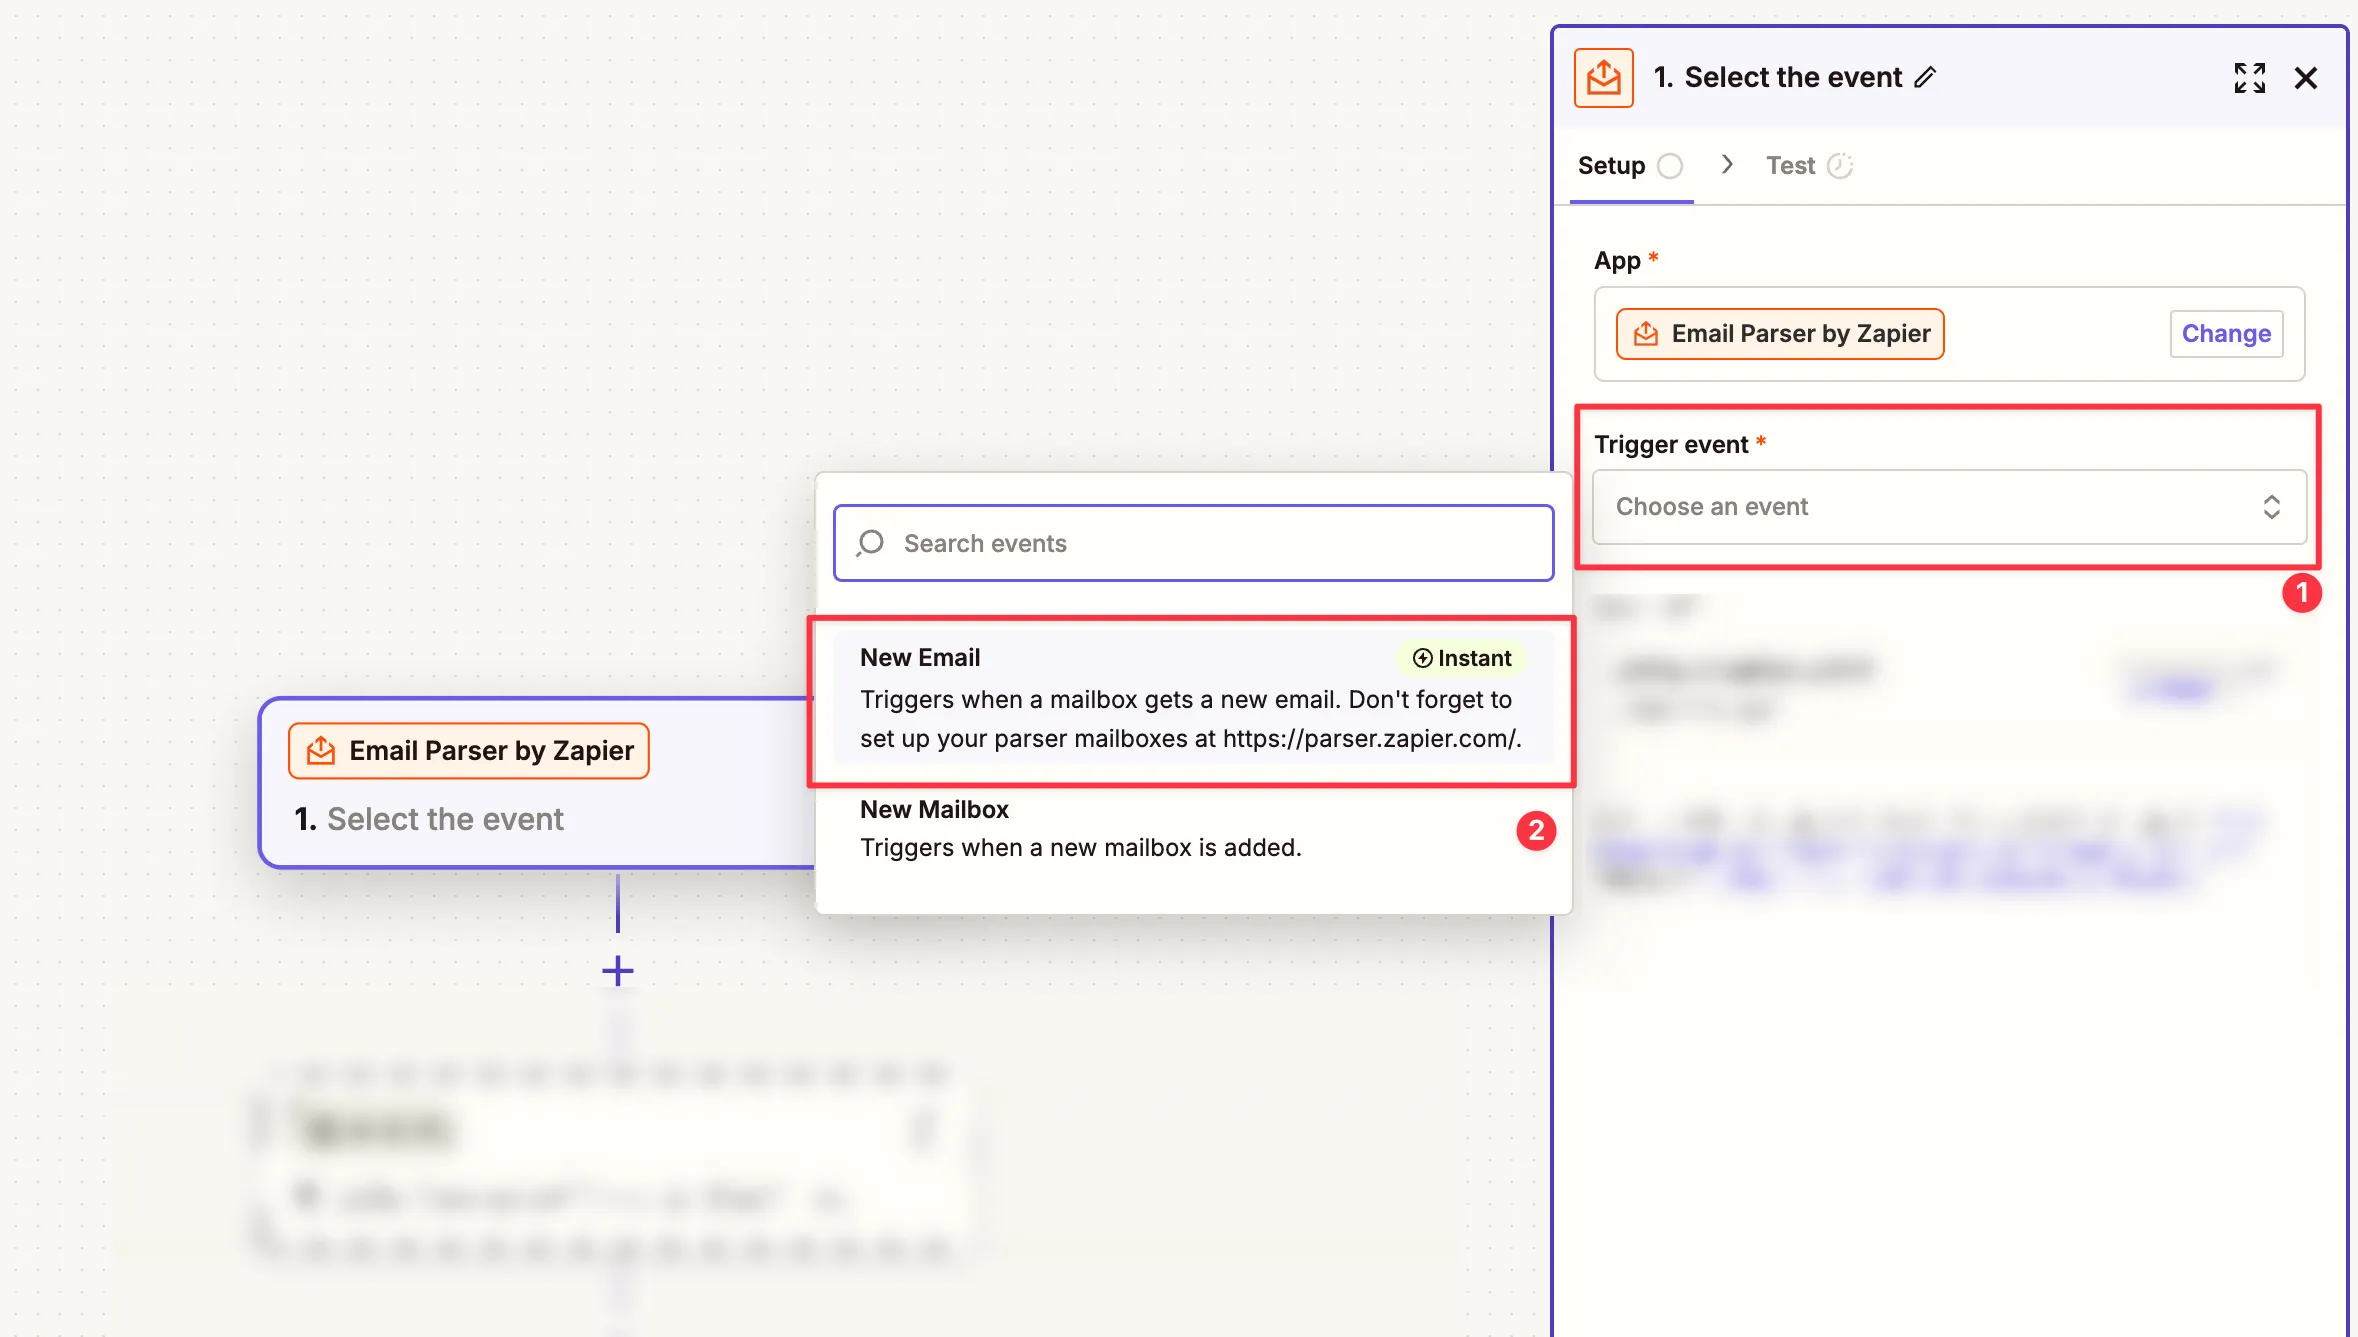
Configure the Email Parser Mailbox
- Select your mailbox (e.g.,
pipelineinbox@robot.zapier.com). - This mailbox will receive emails forwarded from your team.
- Select your mailbox (e.g.,
-
Test the Parser Connection
- Ensure that the parser is connected and ready to process incoming emails.
Step 2: Use the Formatter to Process the Email Content
-
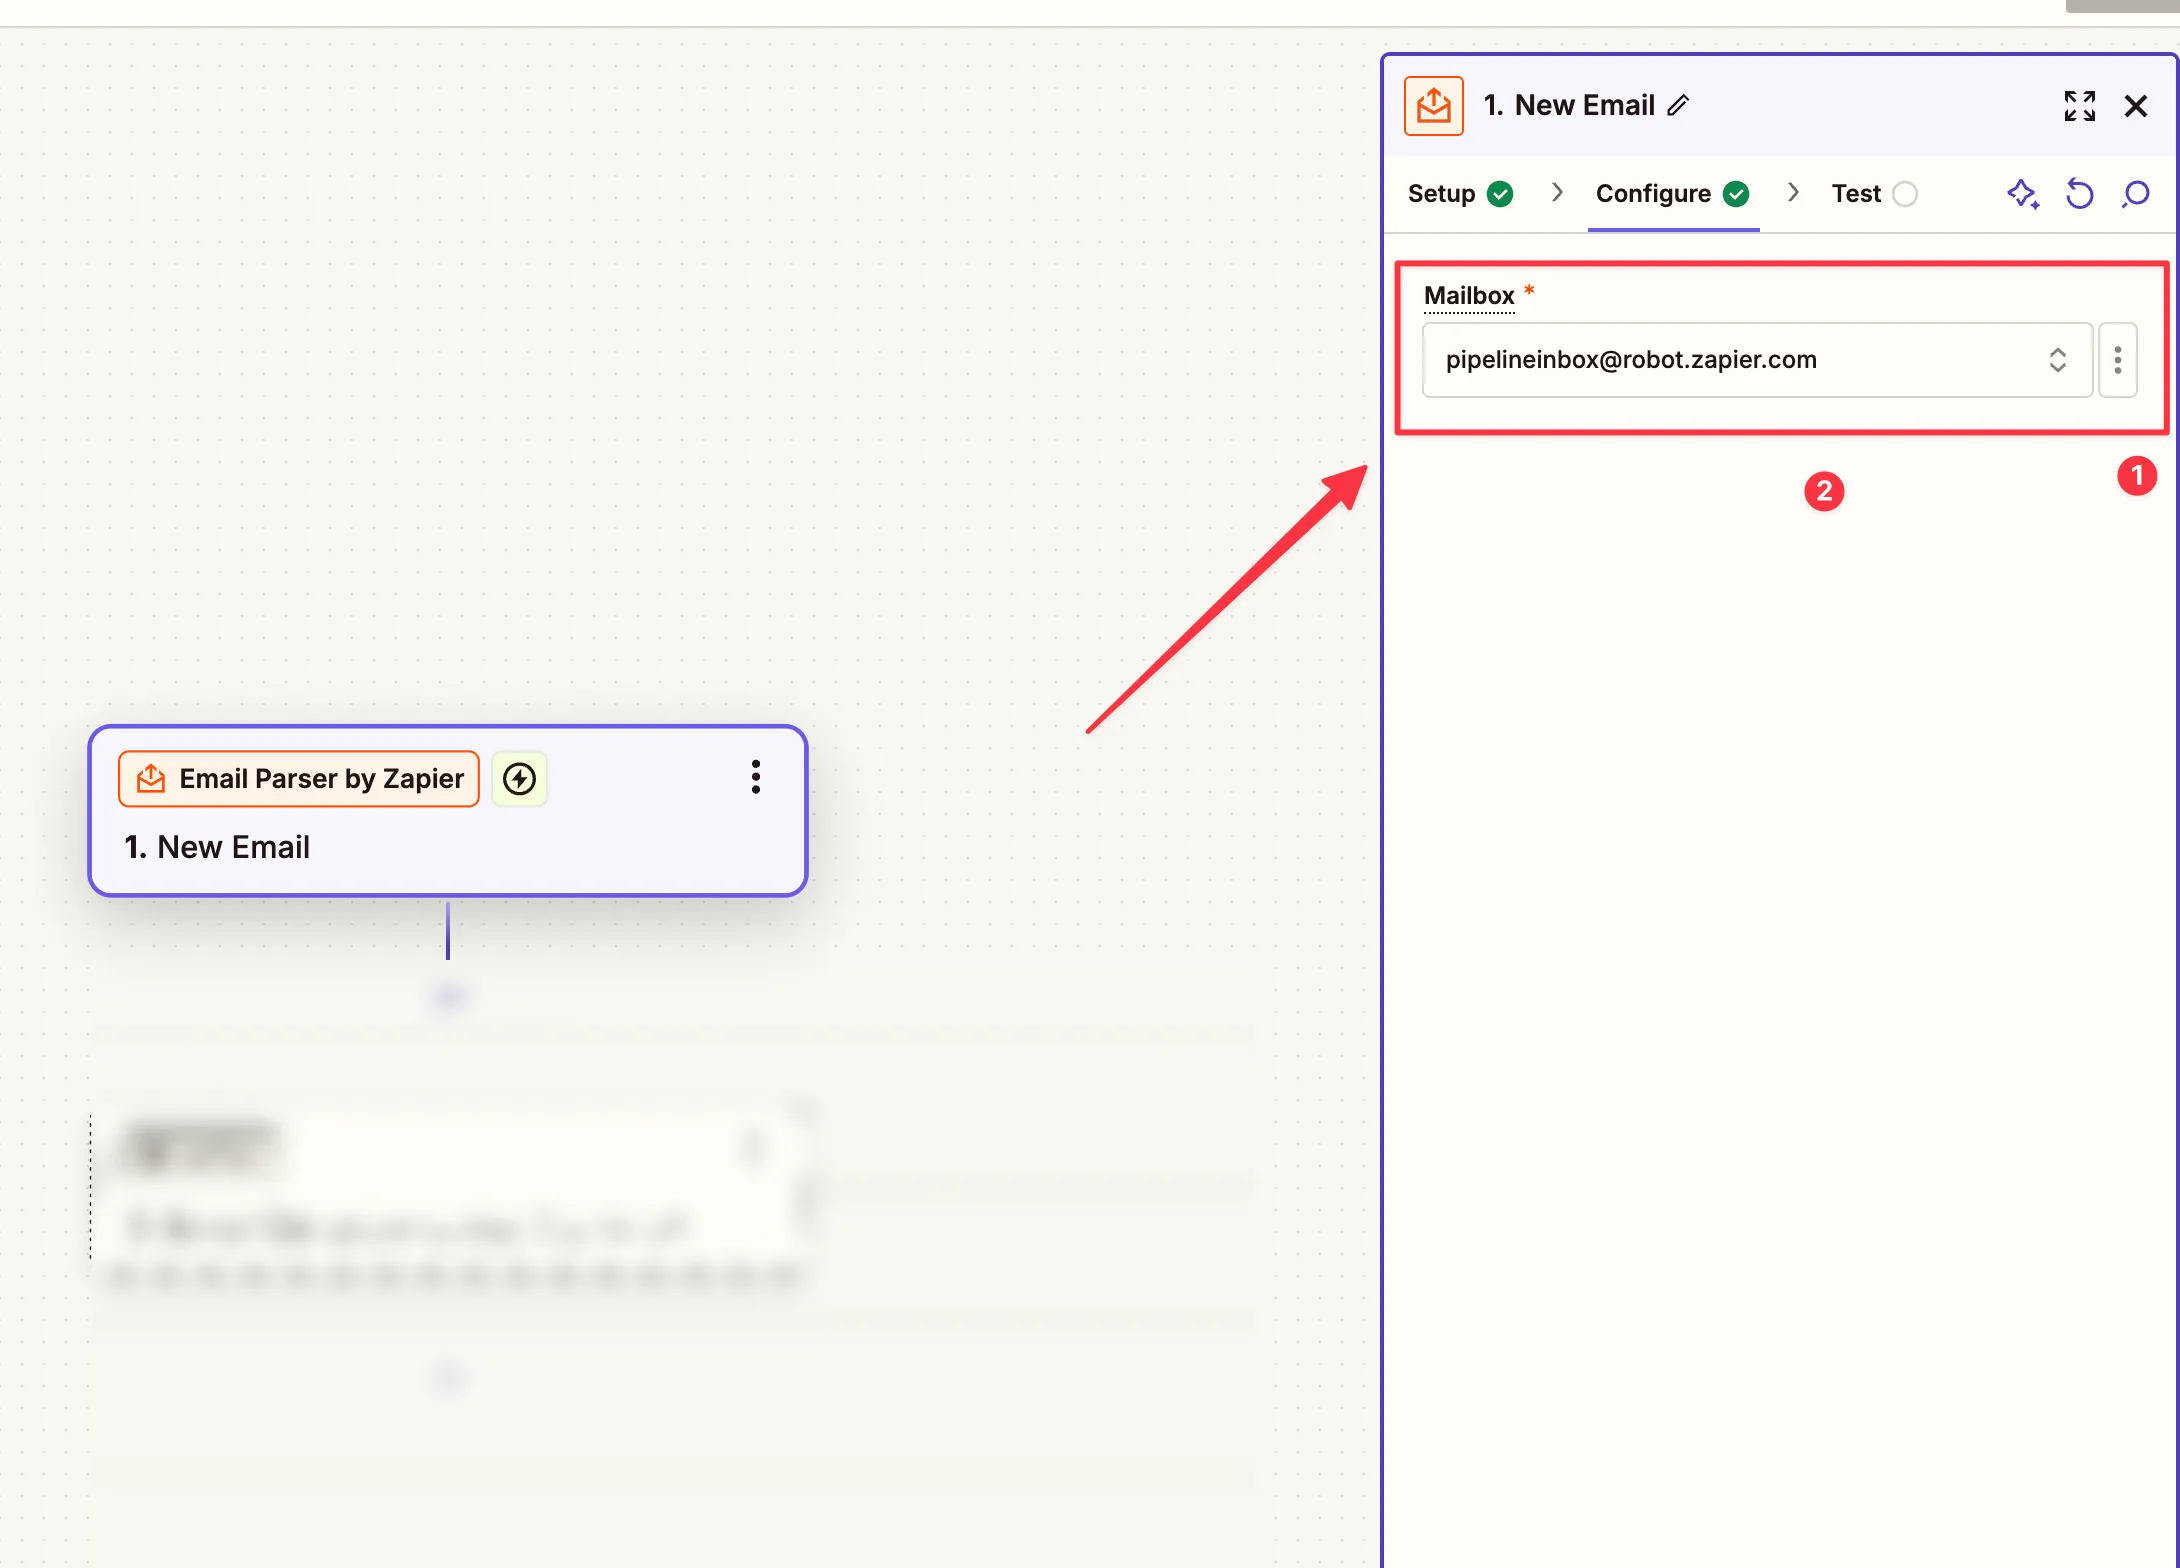
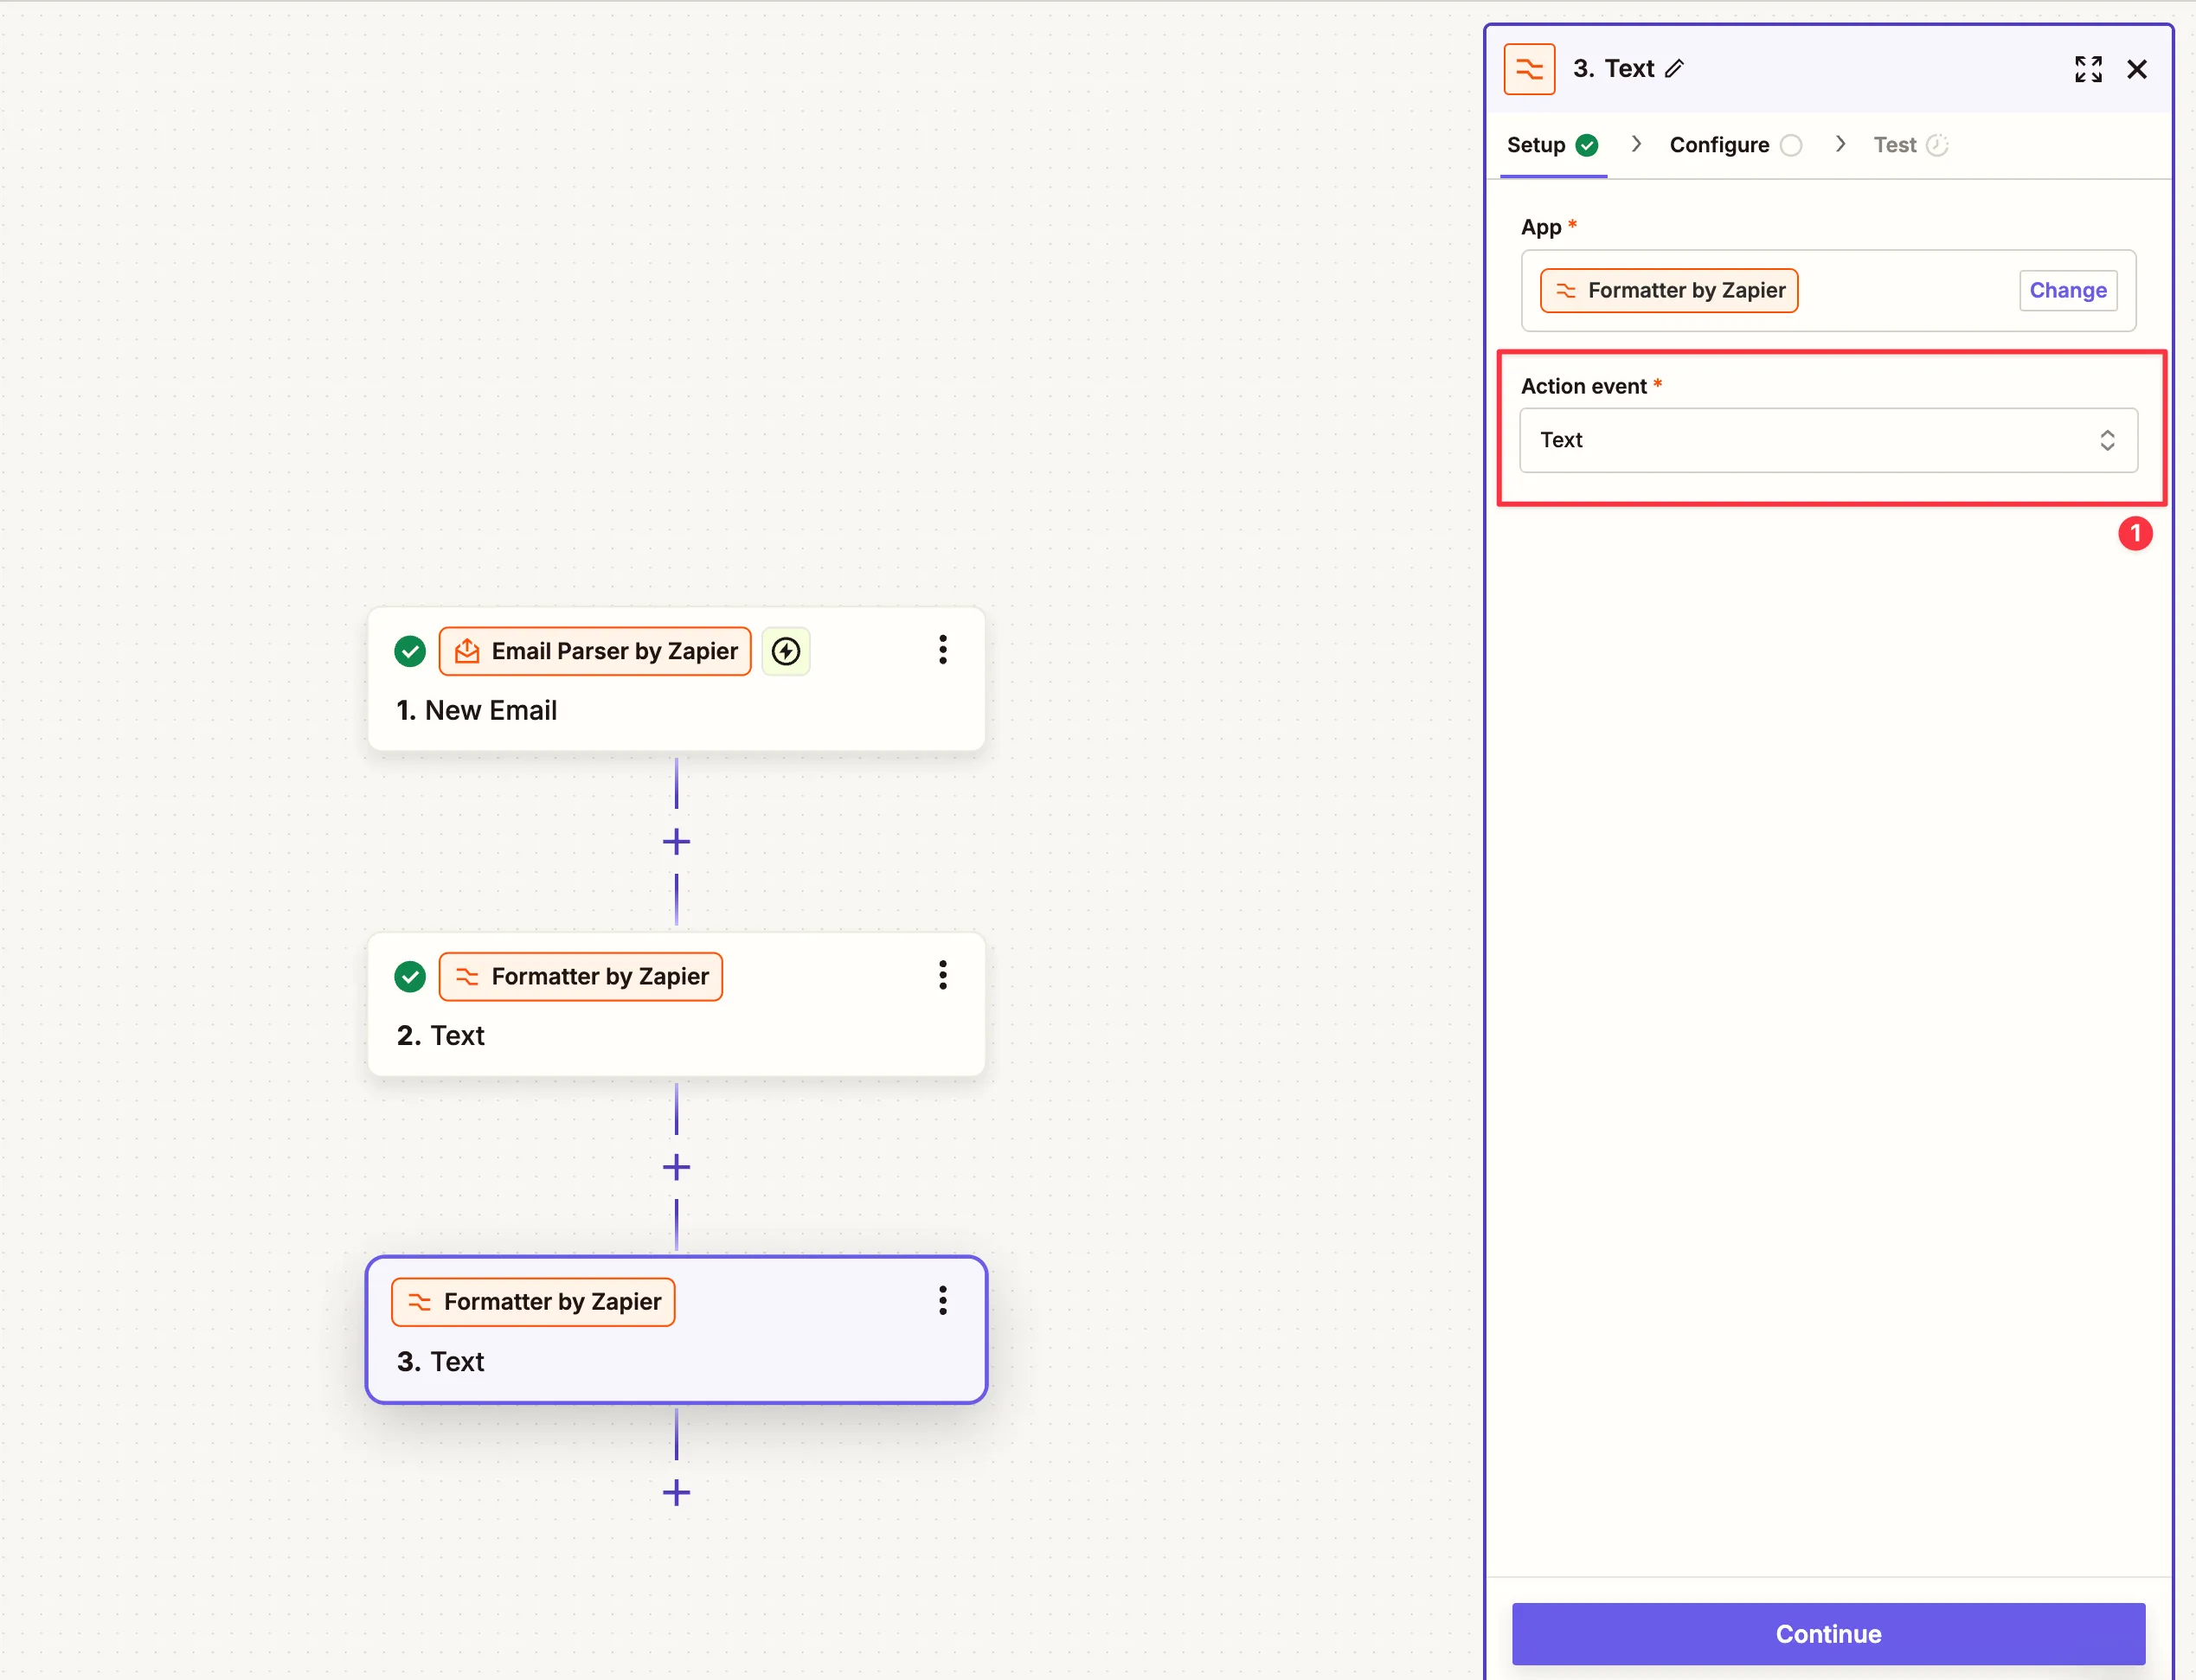
Add a New Step with “Formatter by Zapier”
- After the Email Parser step, add Formatter by Zapier as the next action.
- Choose the Text action event to manipulate the email content.
-
Extract Specific Data Using Regex
- Select the Extract Pattern transform type.
- Input your regex pattern to extract the desired information.
For example, to extract domains from email addresses, use:
(?<=@)[^.]+(?=\.).
-
Map and Test the Input Data
- Map the input field to the data from the previous Email Parser step.
- Run a test to ensure the formatter extracts the correct information.
Step 3: Extract Email Addresses (Optional)
-
Add Another Formatter Step
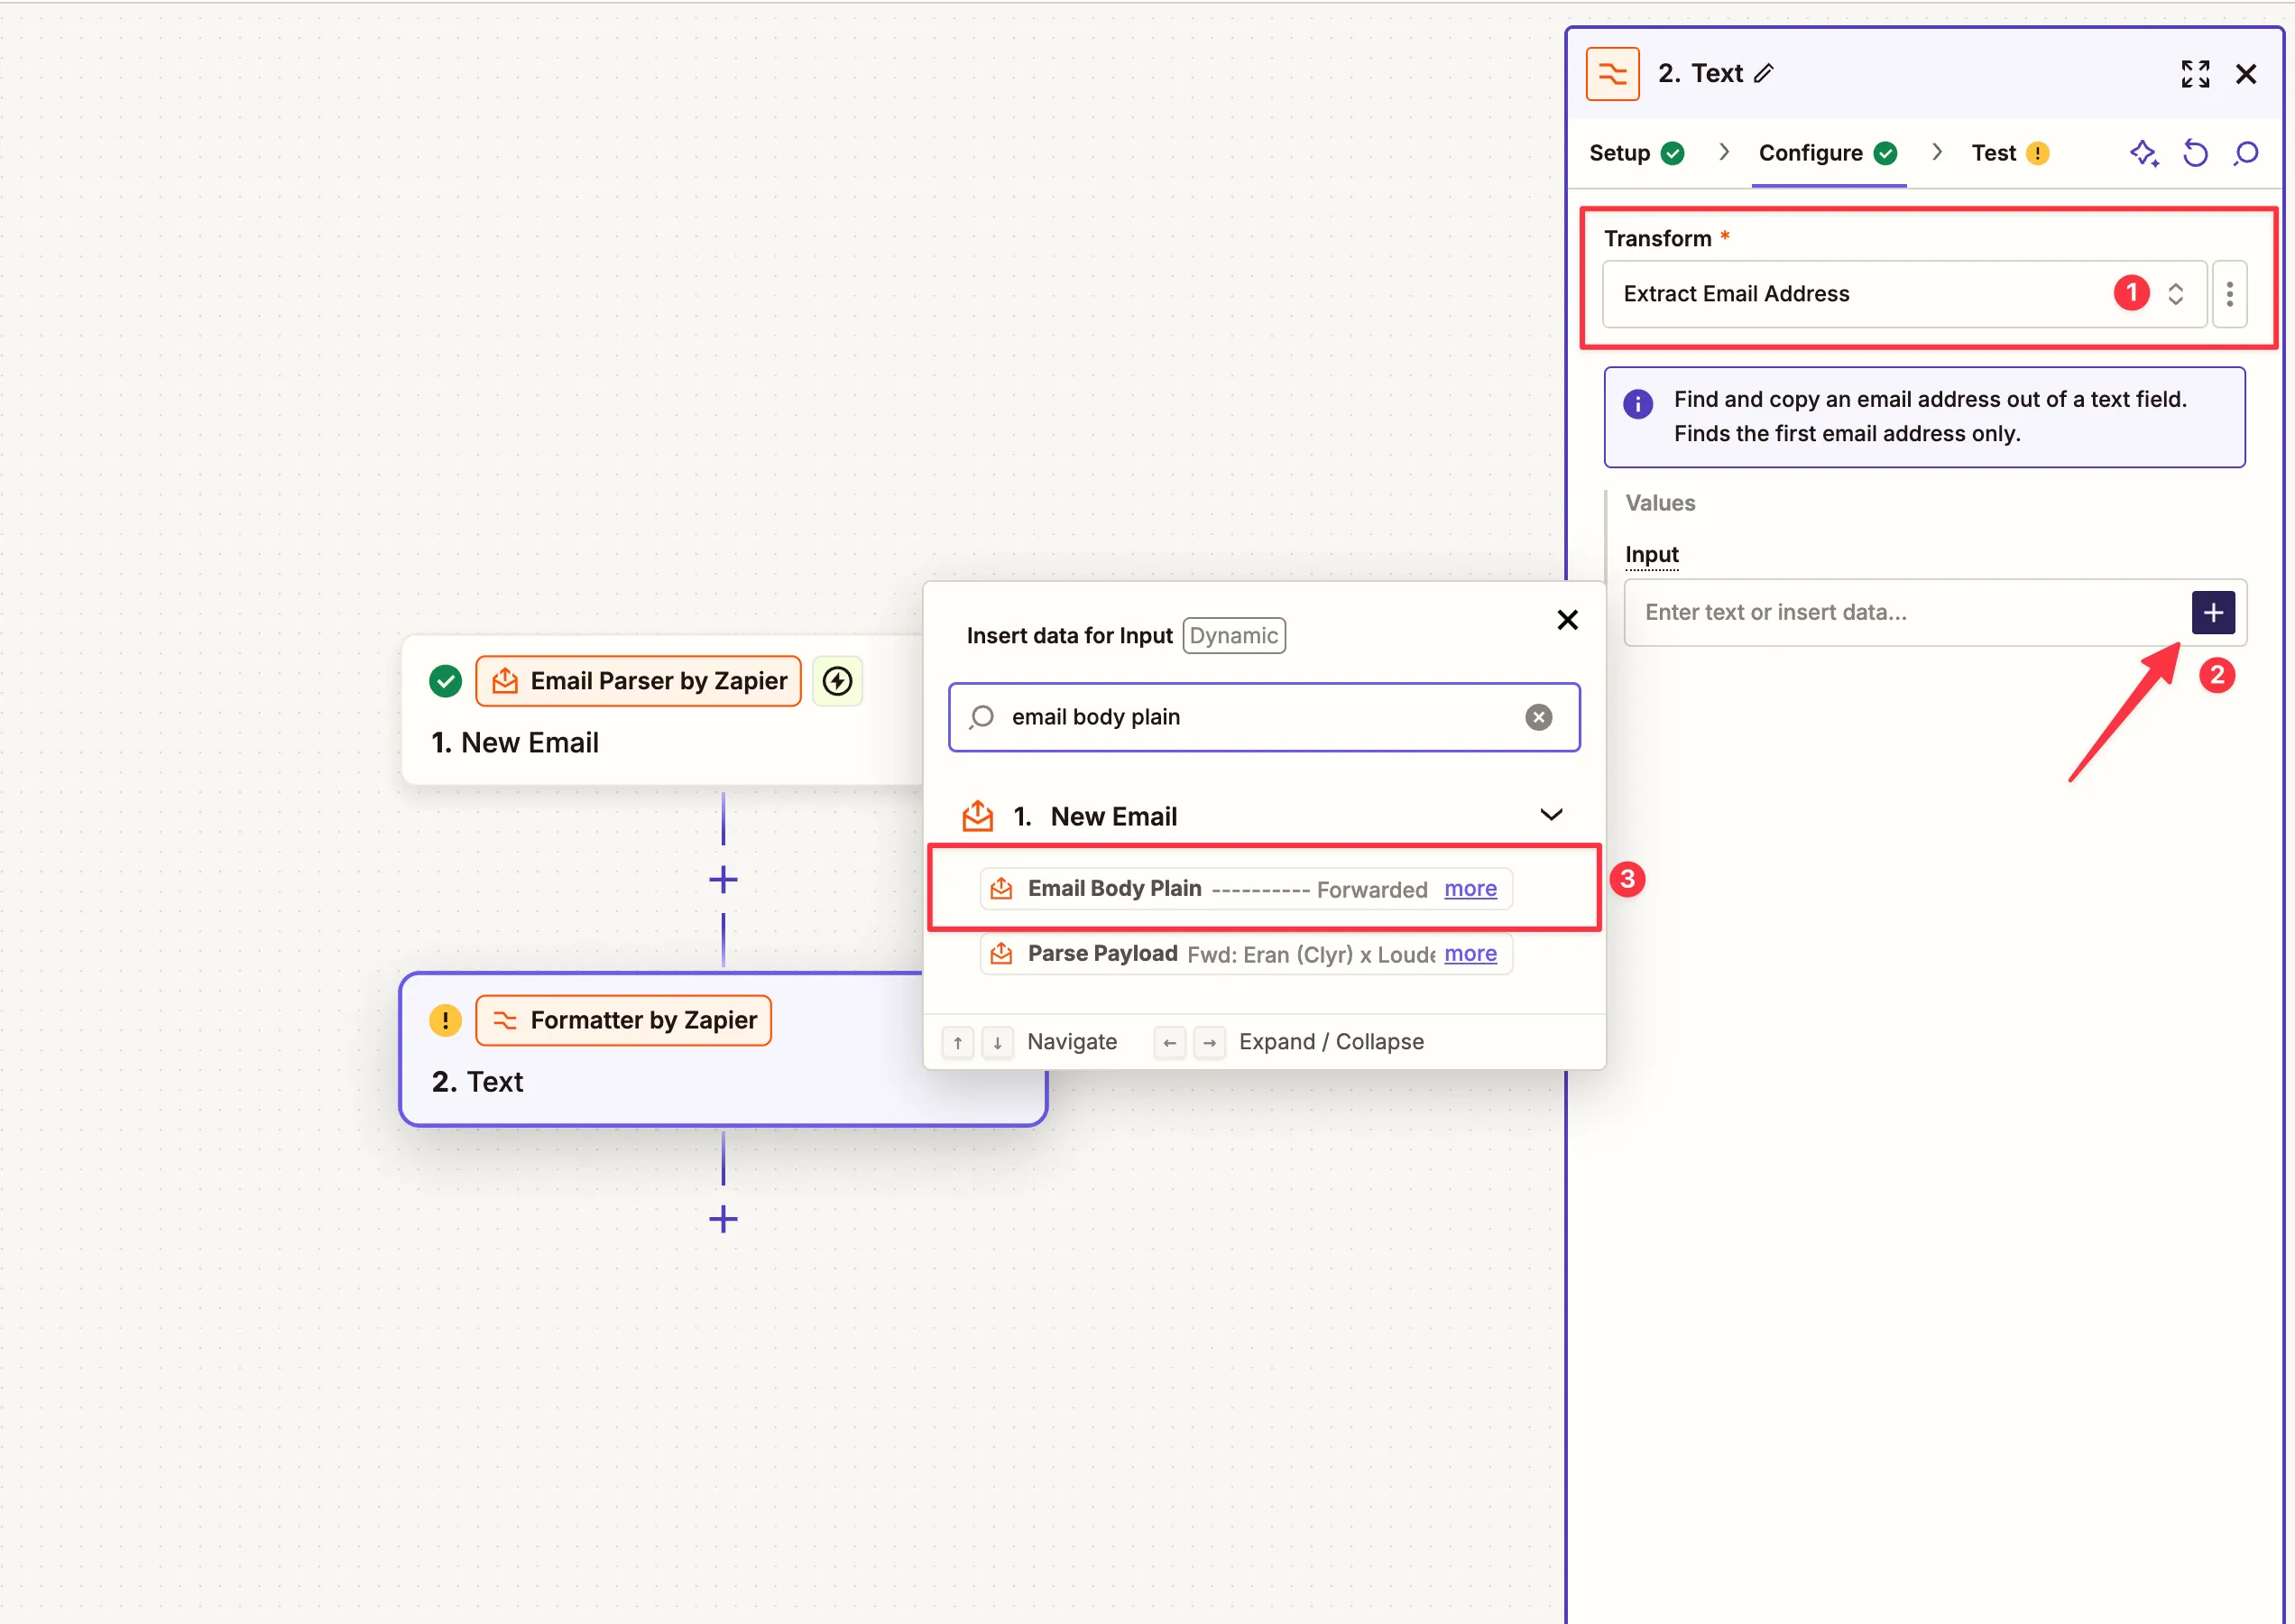
- If you need to extract email addresses from the body of the email, add another Formatter by Zapier step.
- Choose the Extract Email Address transform type.
-
Map the Input Field
- Map the email body content from the parser into this step.
- Test the output to confirm the extraction works properly.
Completing the Automation: Adding Emails to Affinity
In the second half of this guide, we will finish building the automation that forwards emails and updates Affinity with the parsed and formatted data.
Step 4: Advanced Pattern Extraction
-
Set Up Advanced Regex for Domain Extraction
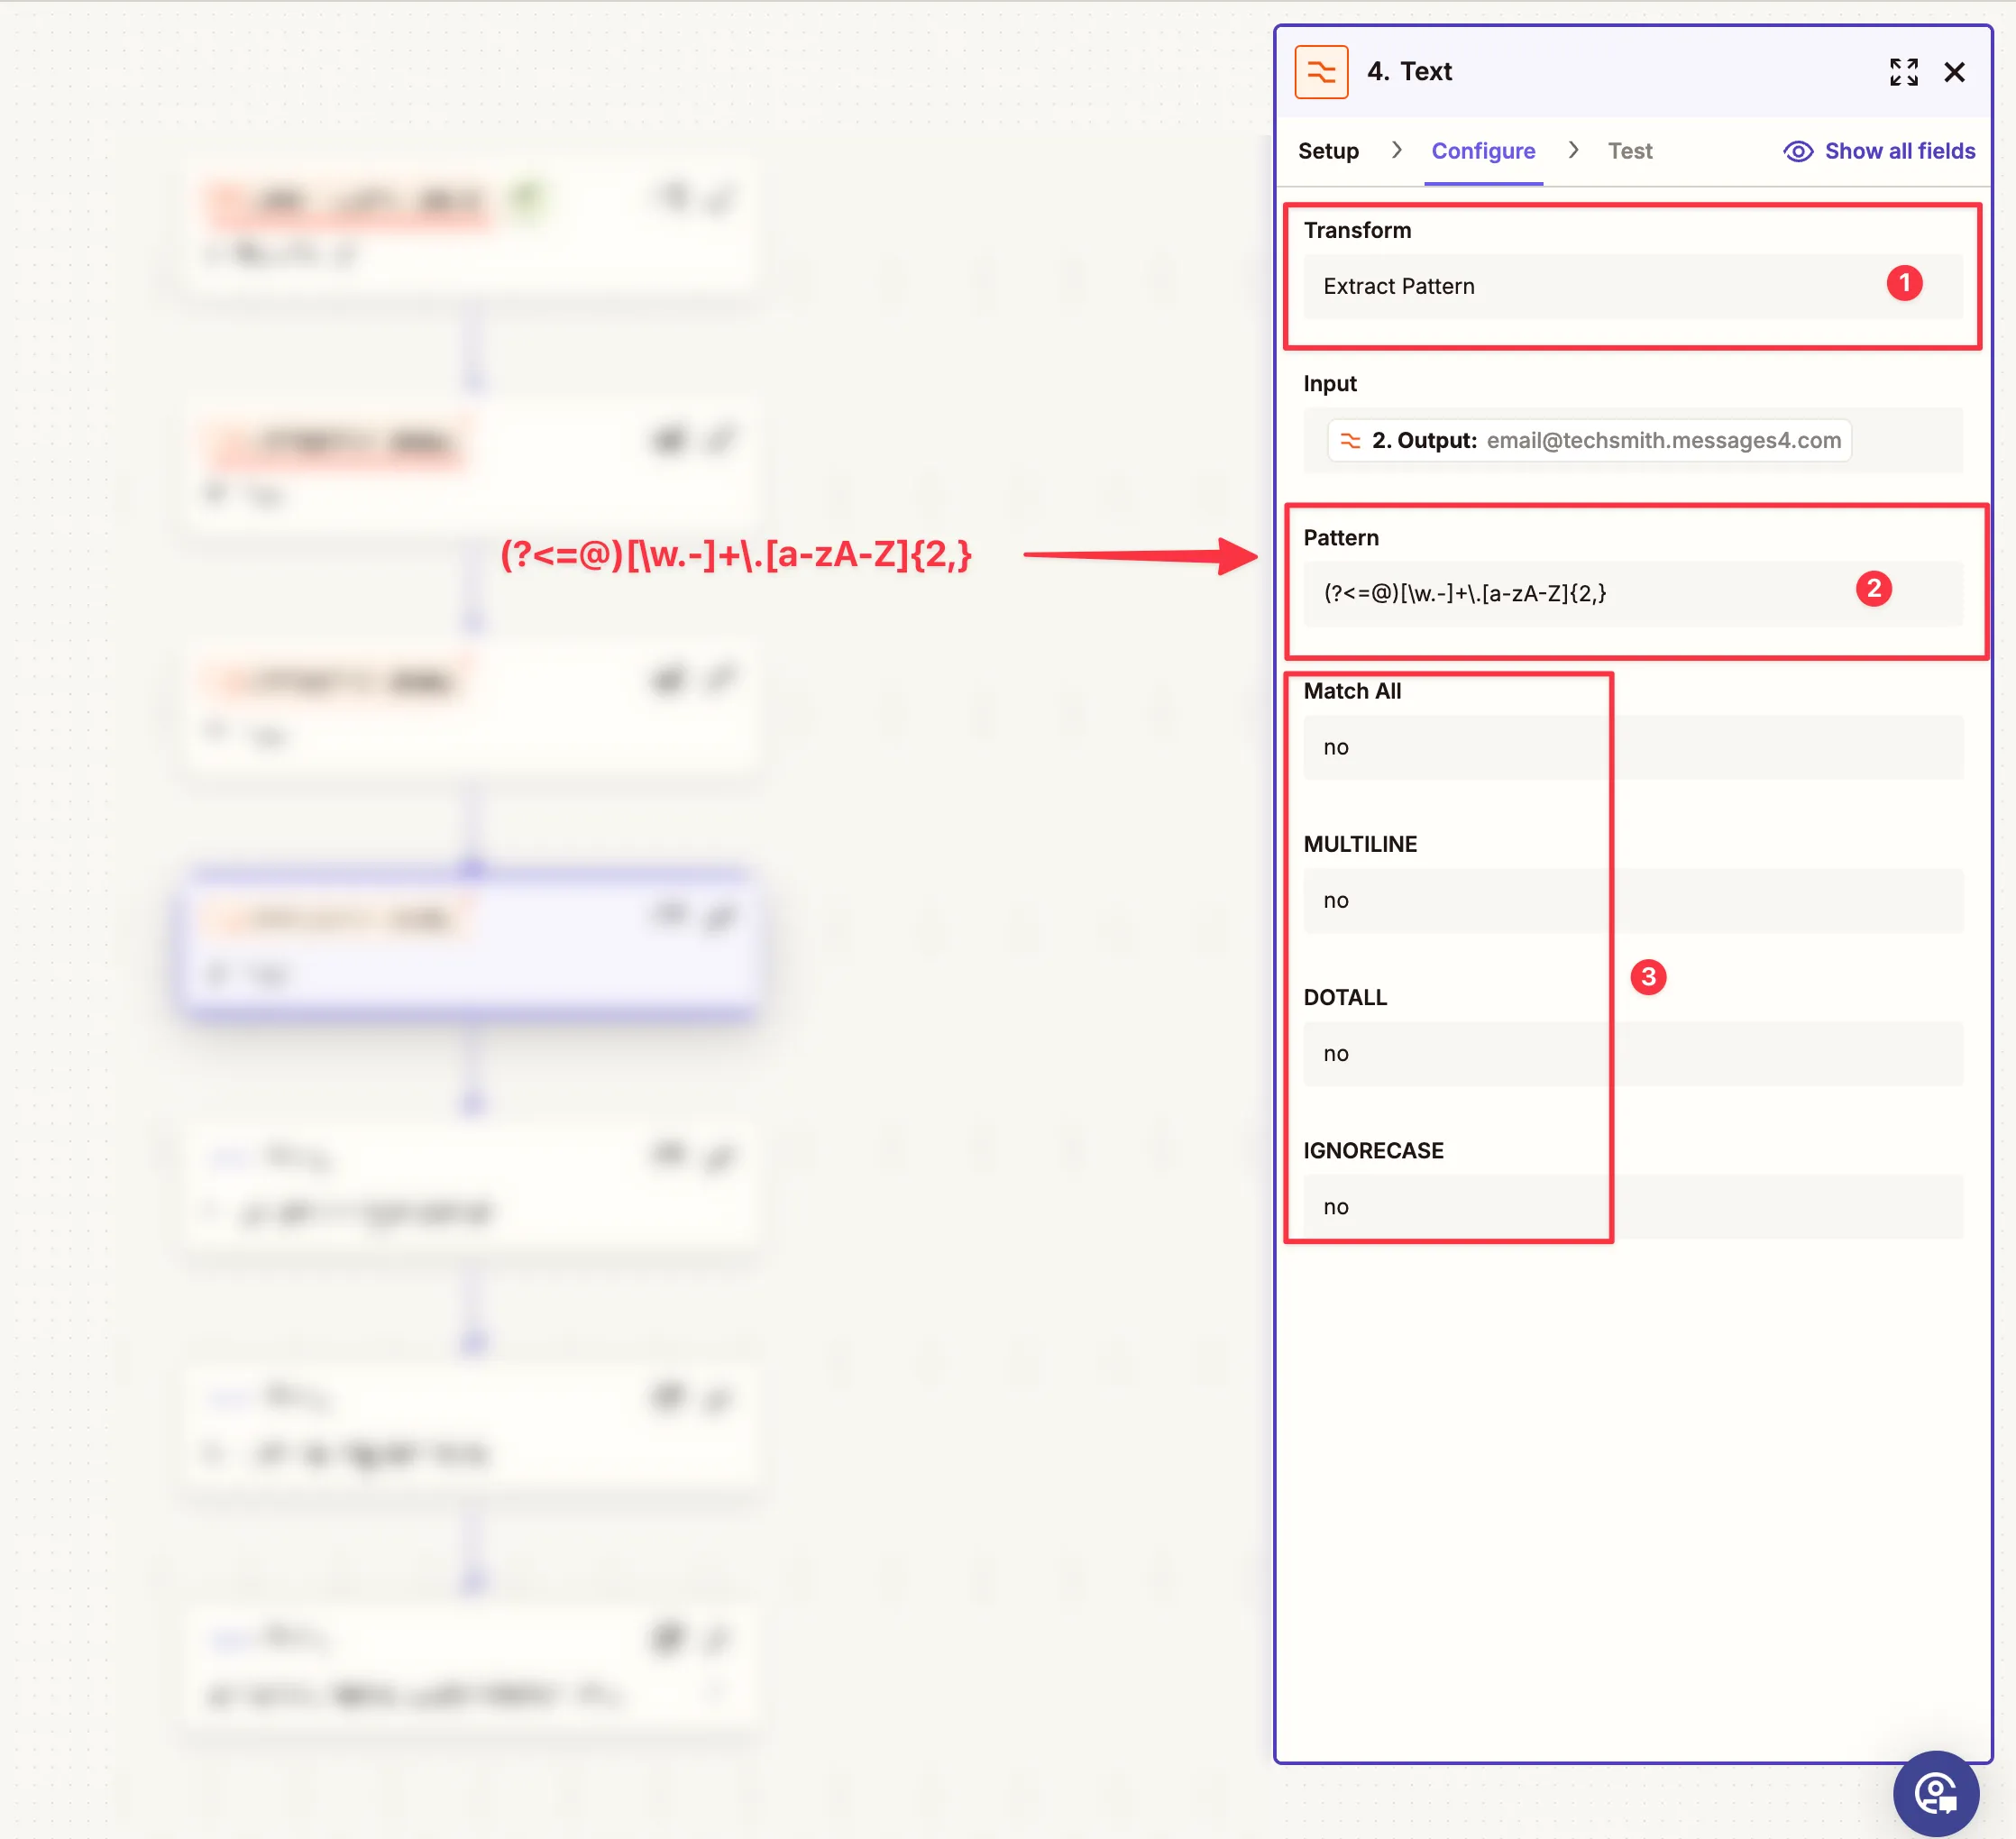
- Use the Extract Pattern feature in Formatter by Zapier to pull domains from email addresses using an advanced regex pattern:
(?<=@)[\w.-]+.[a-zA-Z]{2,}.
- Use the Extract Pattern feature in Formatter by Zapier to pull domains from email addresses using an advanced regex pattern:
Step 5: Connect Affinity to the Automation
-
Add the Affinity App
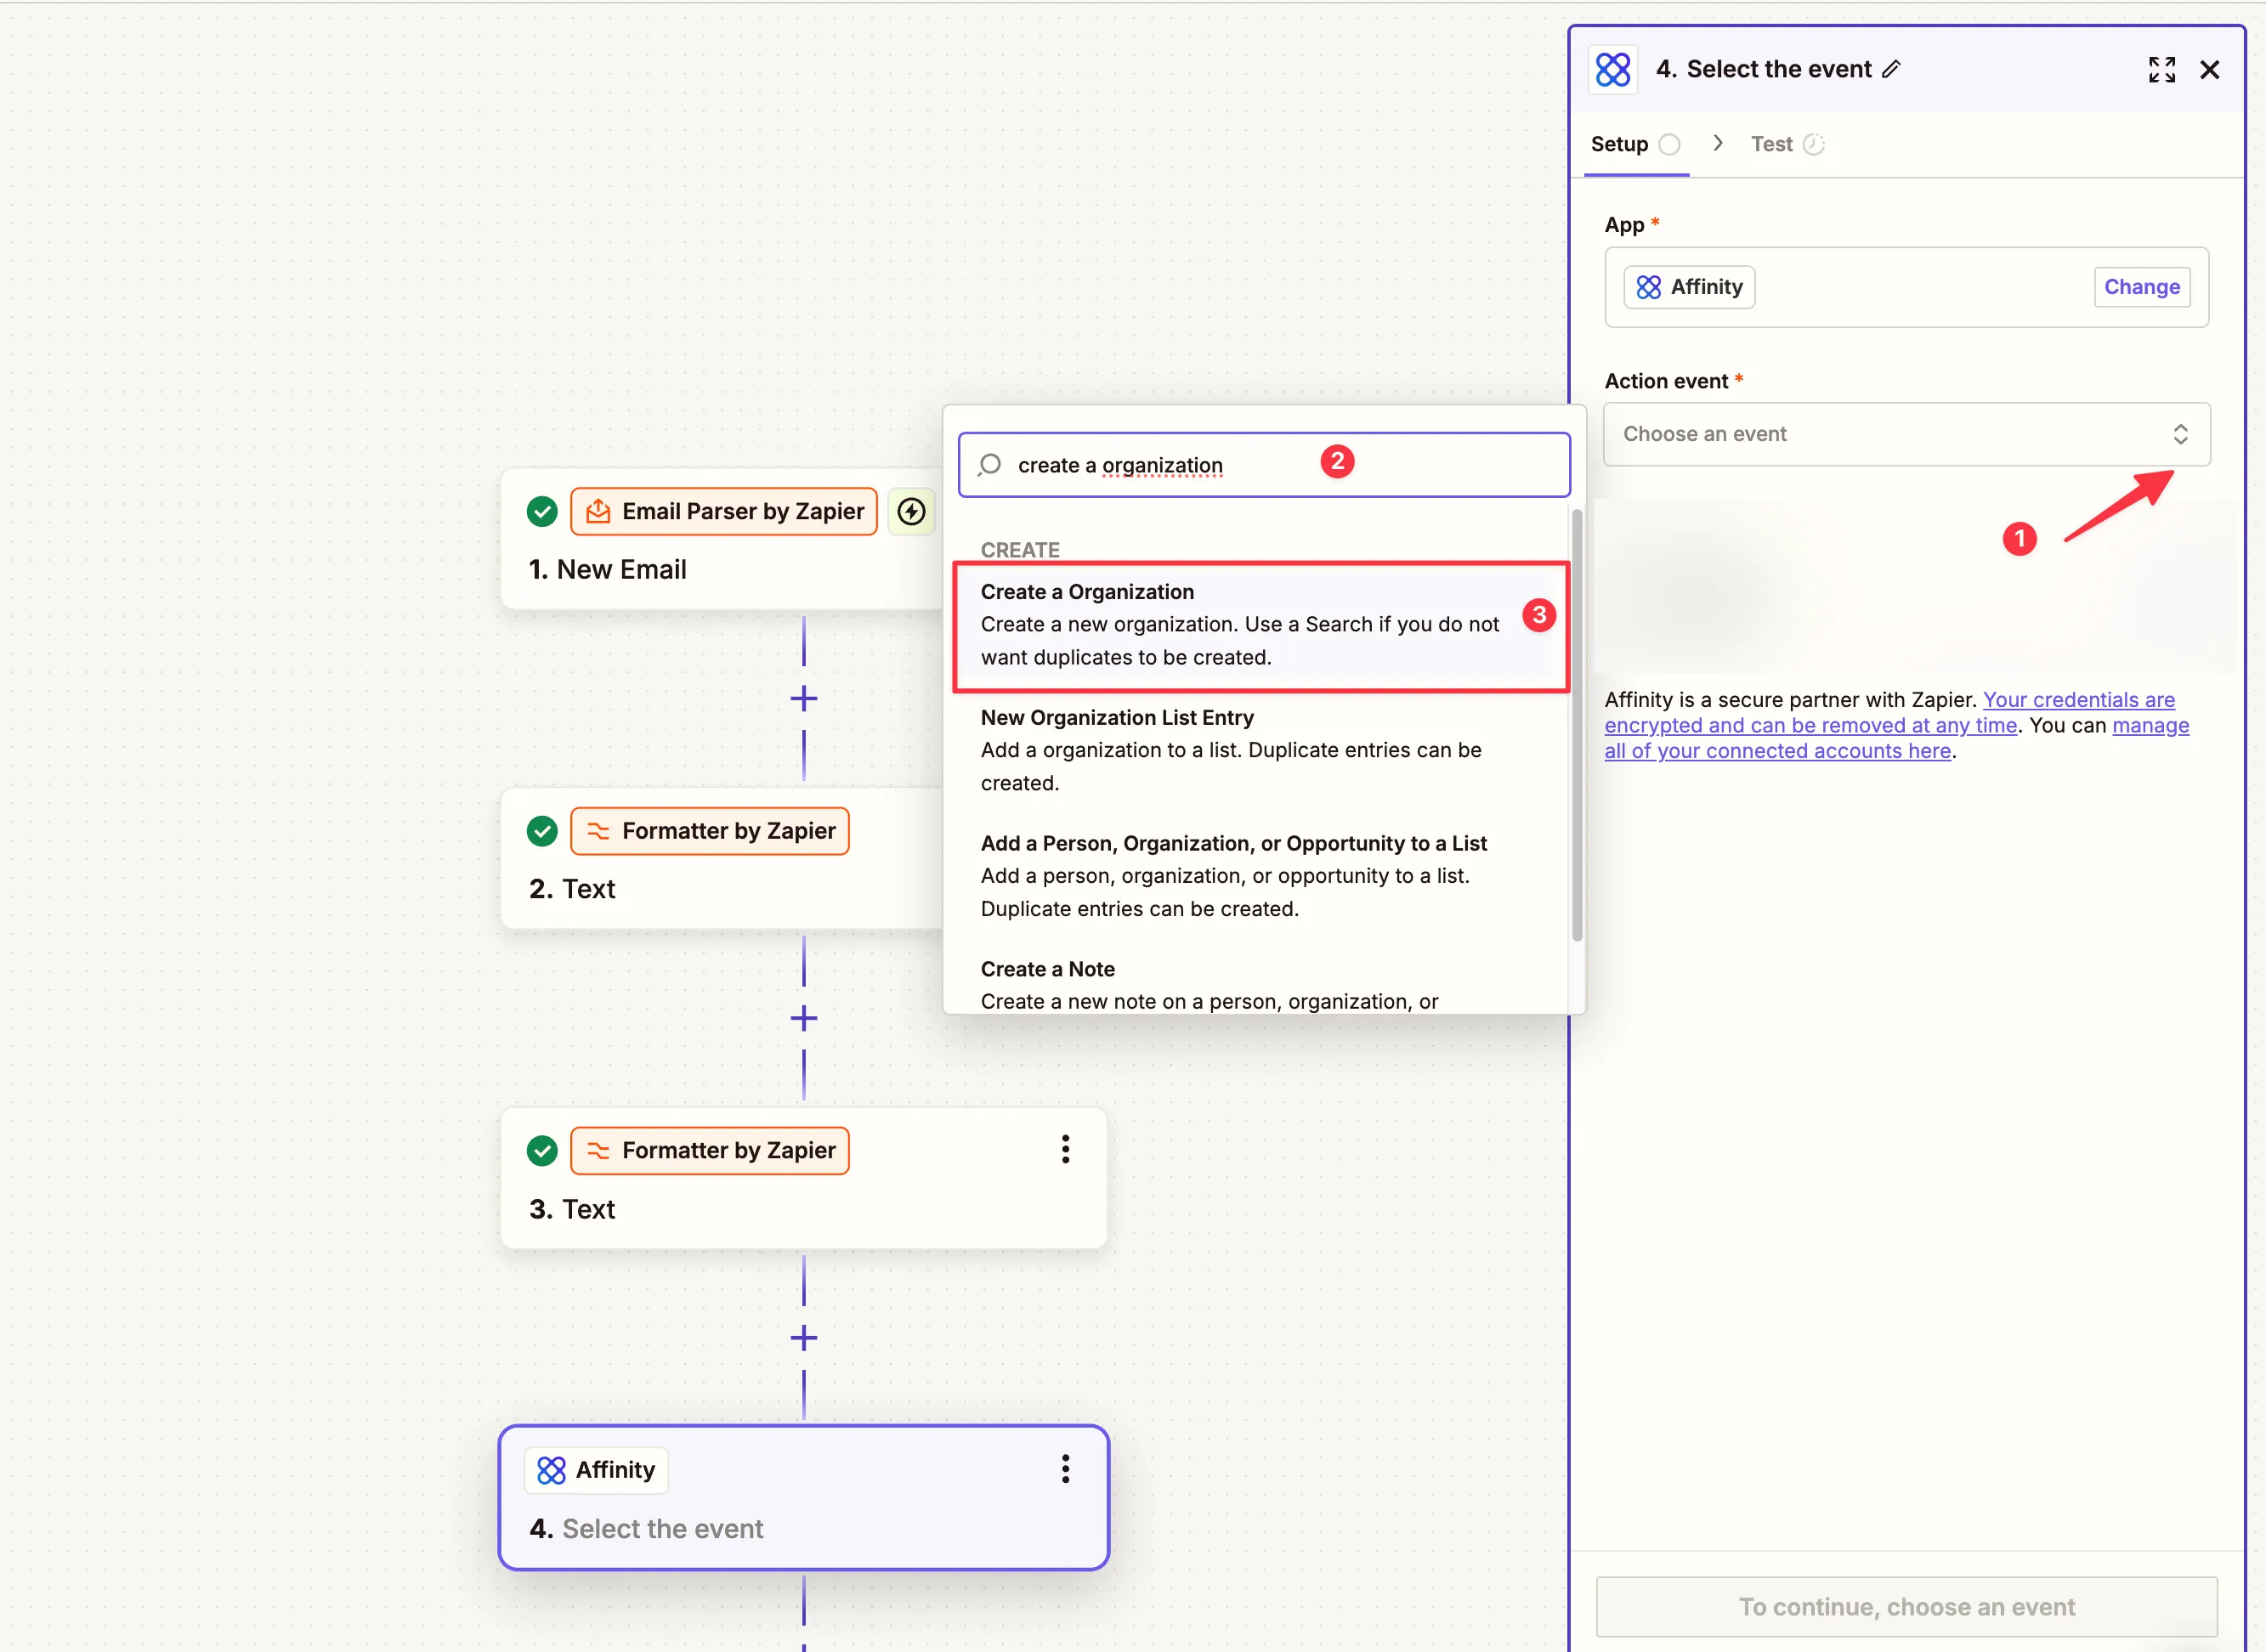
- Search for the Affinity app in Zapier.
- Select an action event, such as Create a Organization.
-
Create a New Organisation
- Select Create a Organisation as the action event.
- Map the extracted data (e.g., organisation name or domain) from previous steps.
-
Map Dynamic Input Data
- Use dynamic fields like
Output 0from Formatter to populate the organisation name and domain.
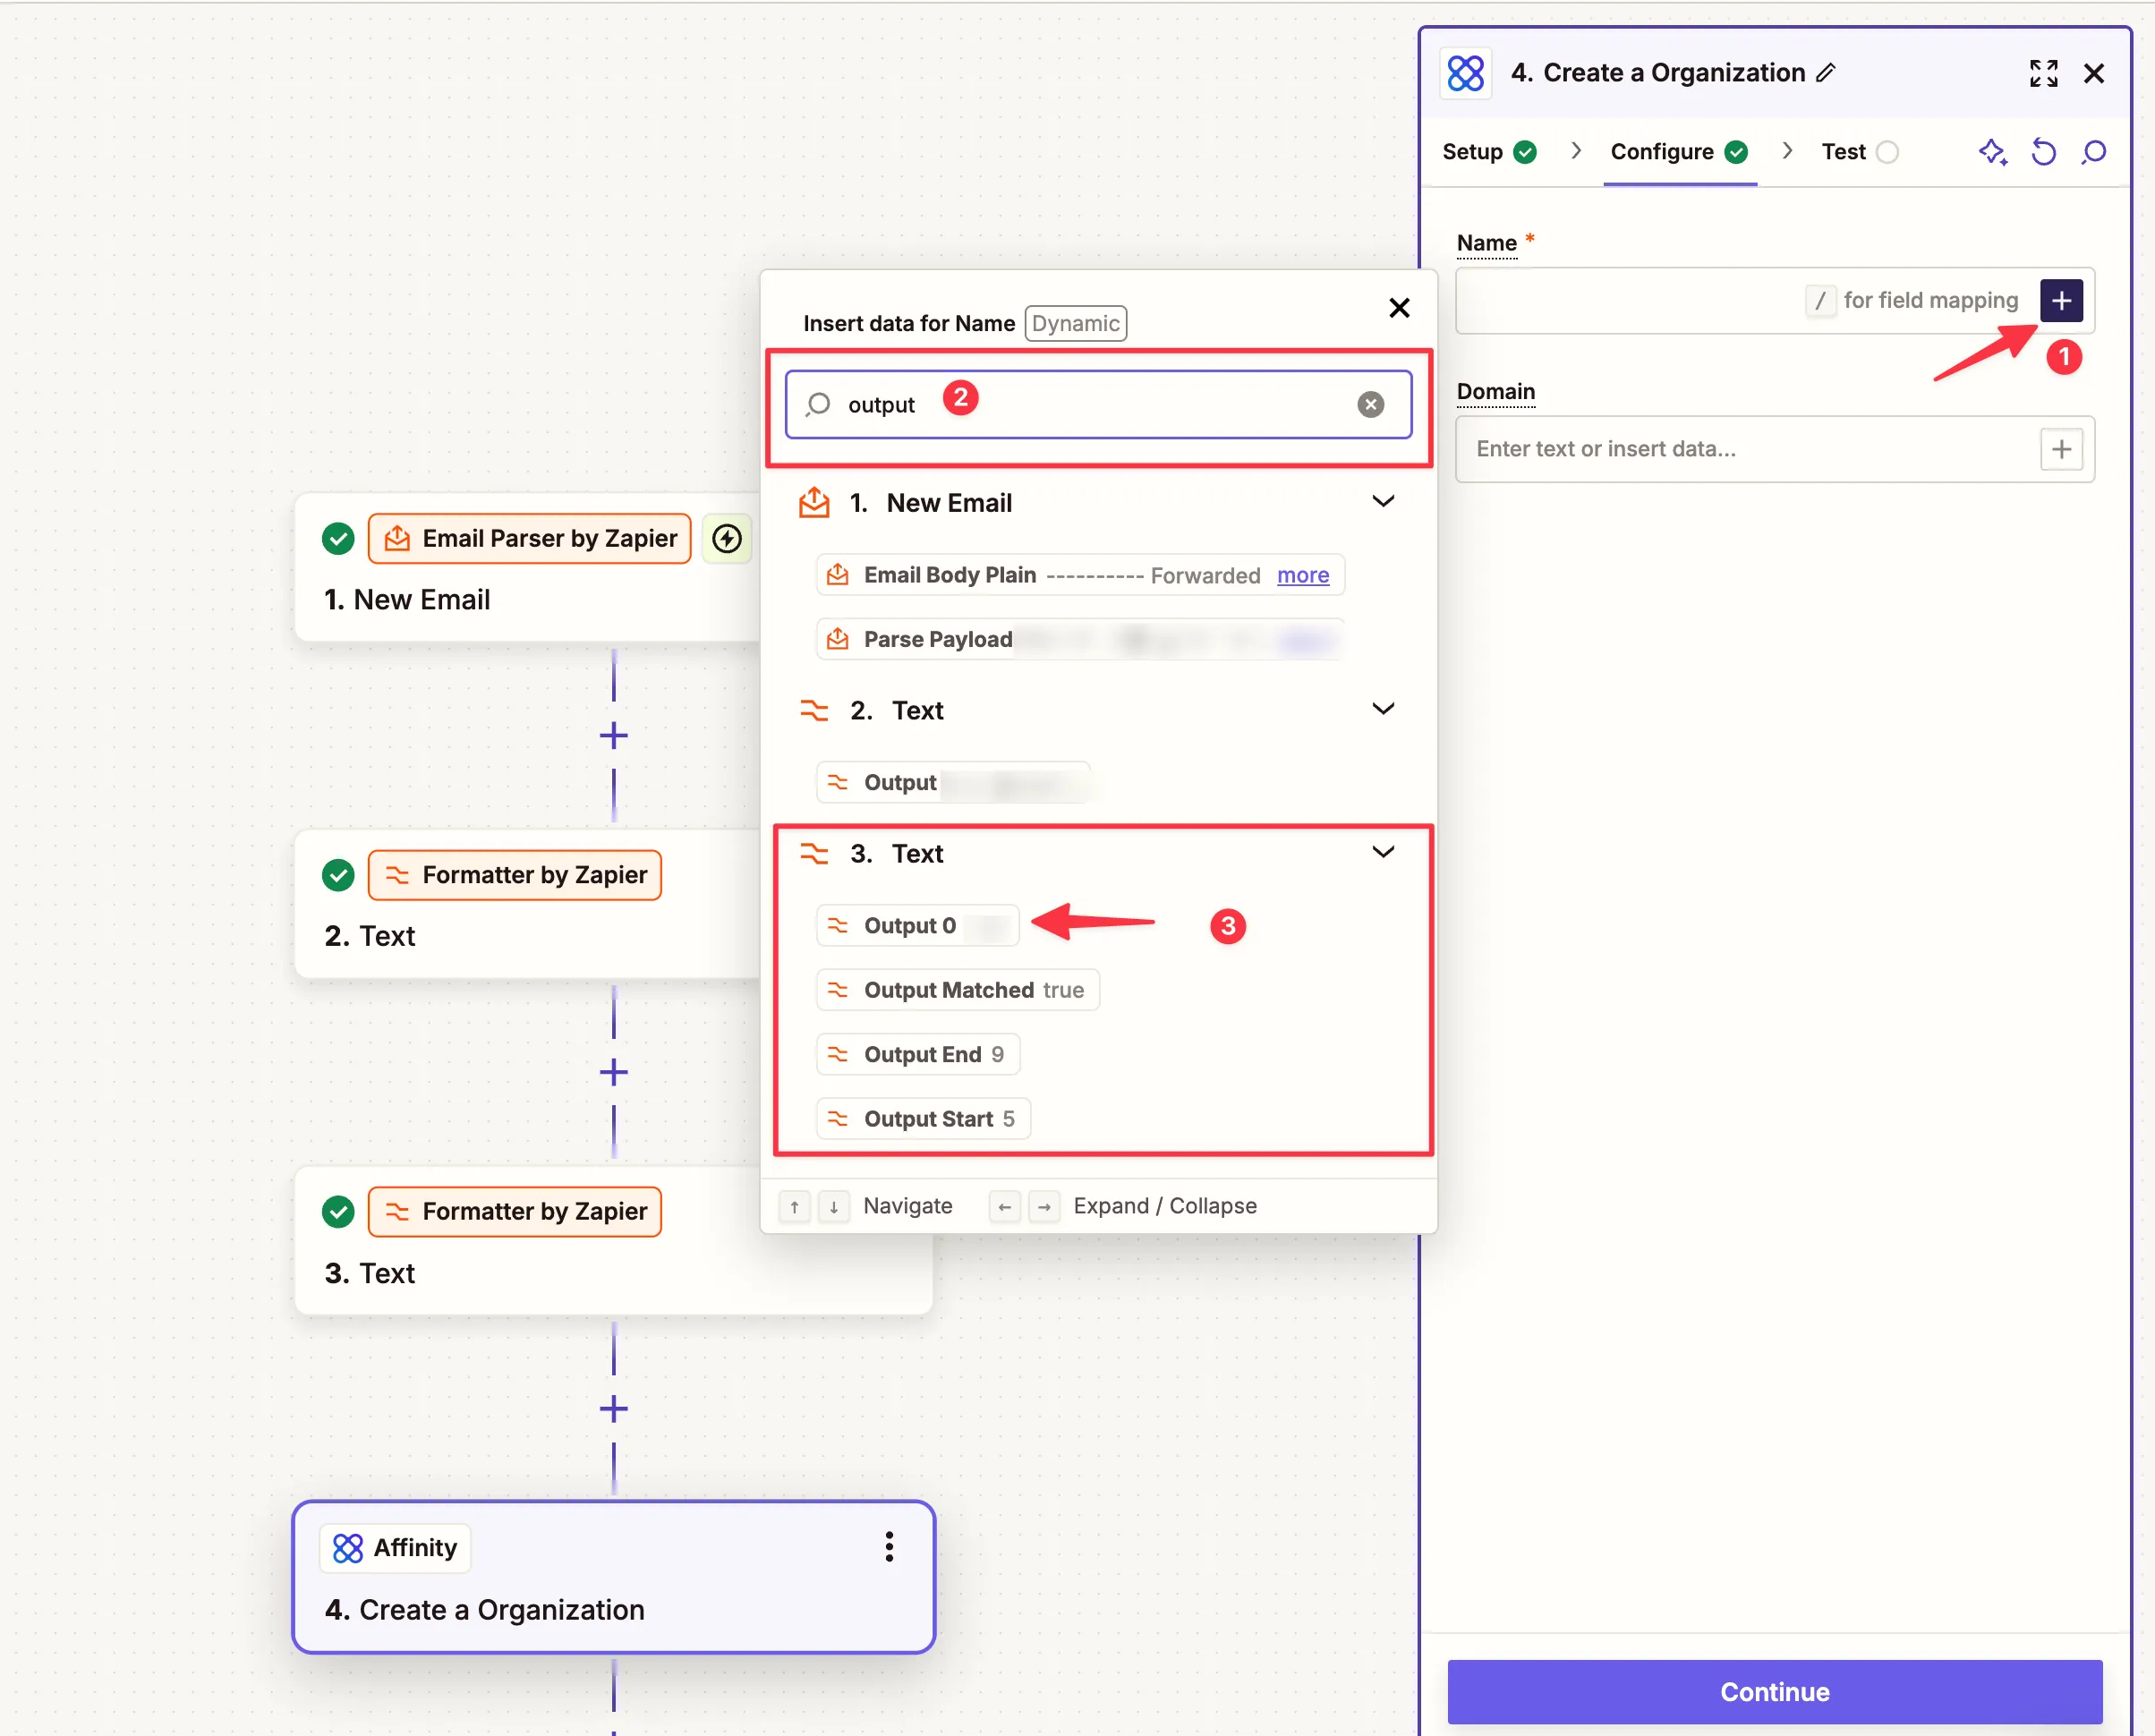
- Use dynamic fields like
Step 6: Searching for Existing Organisations
-
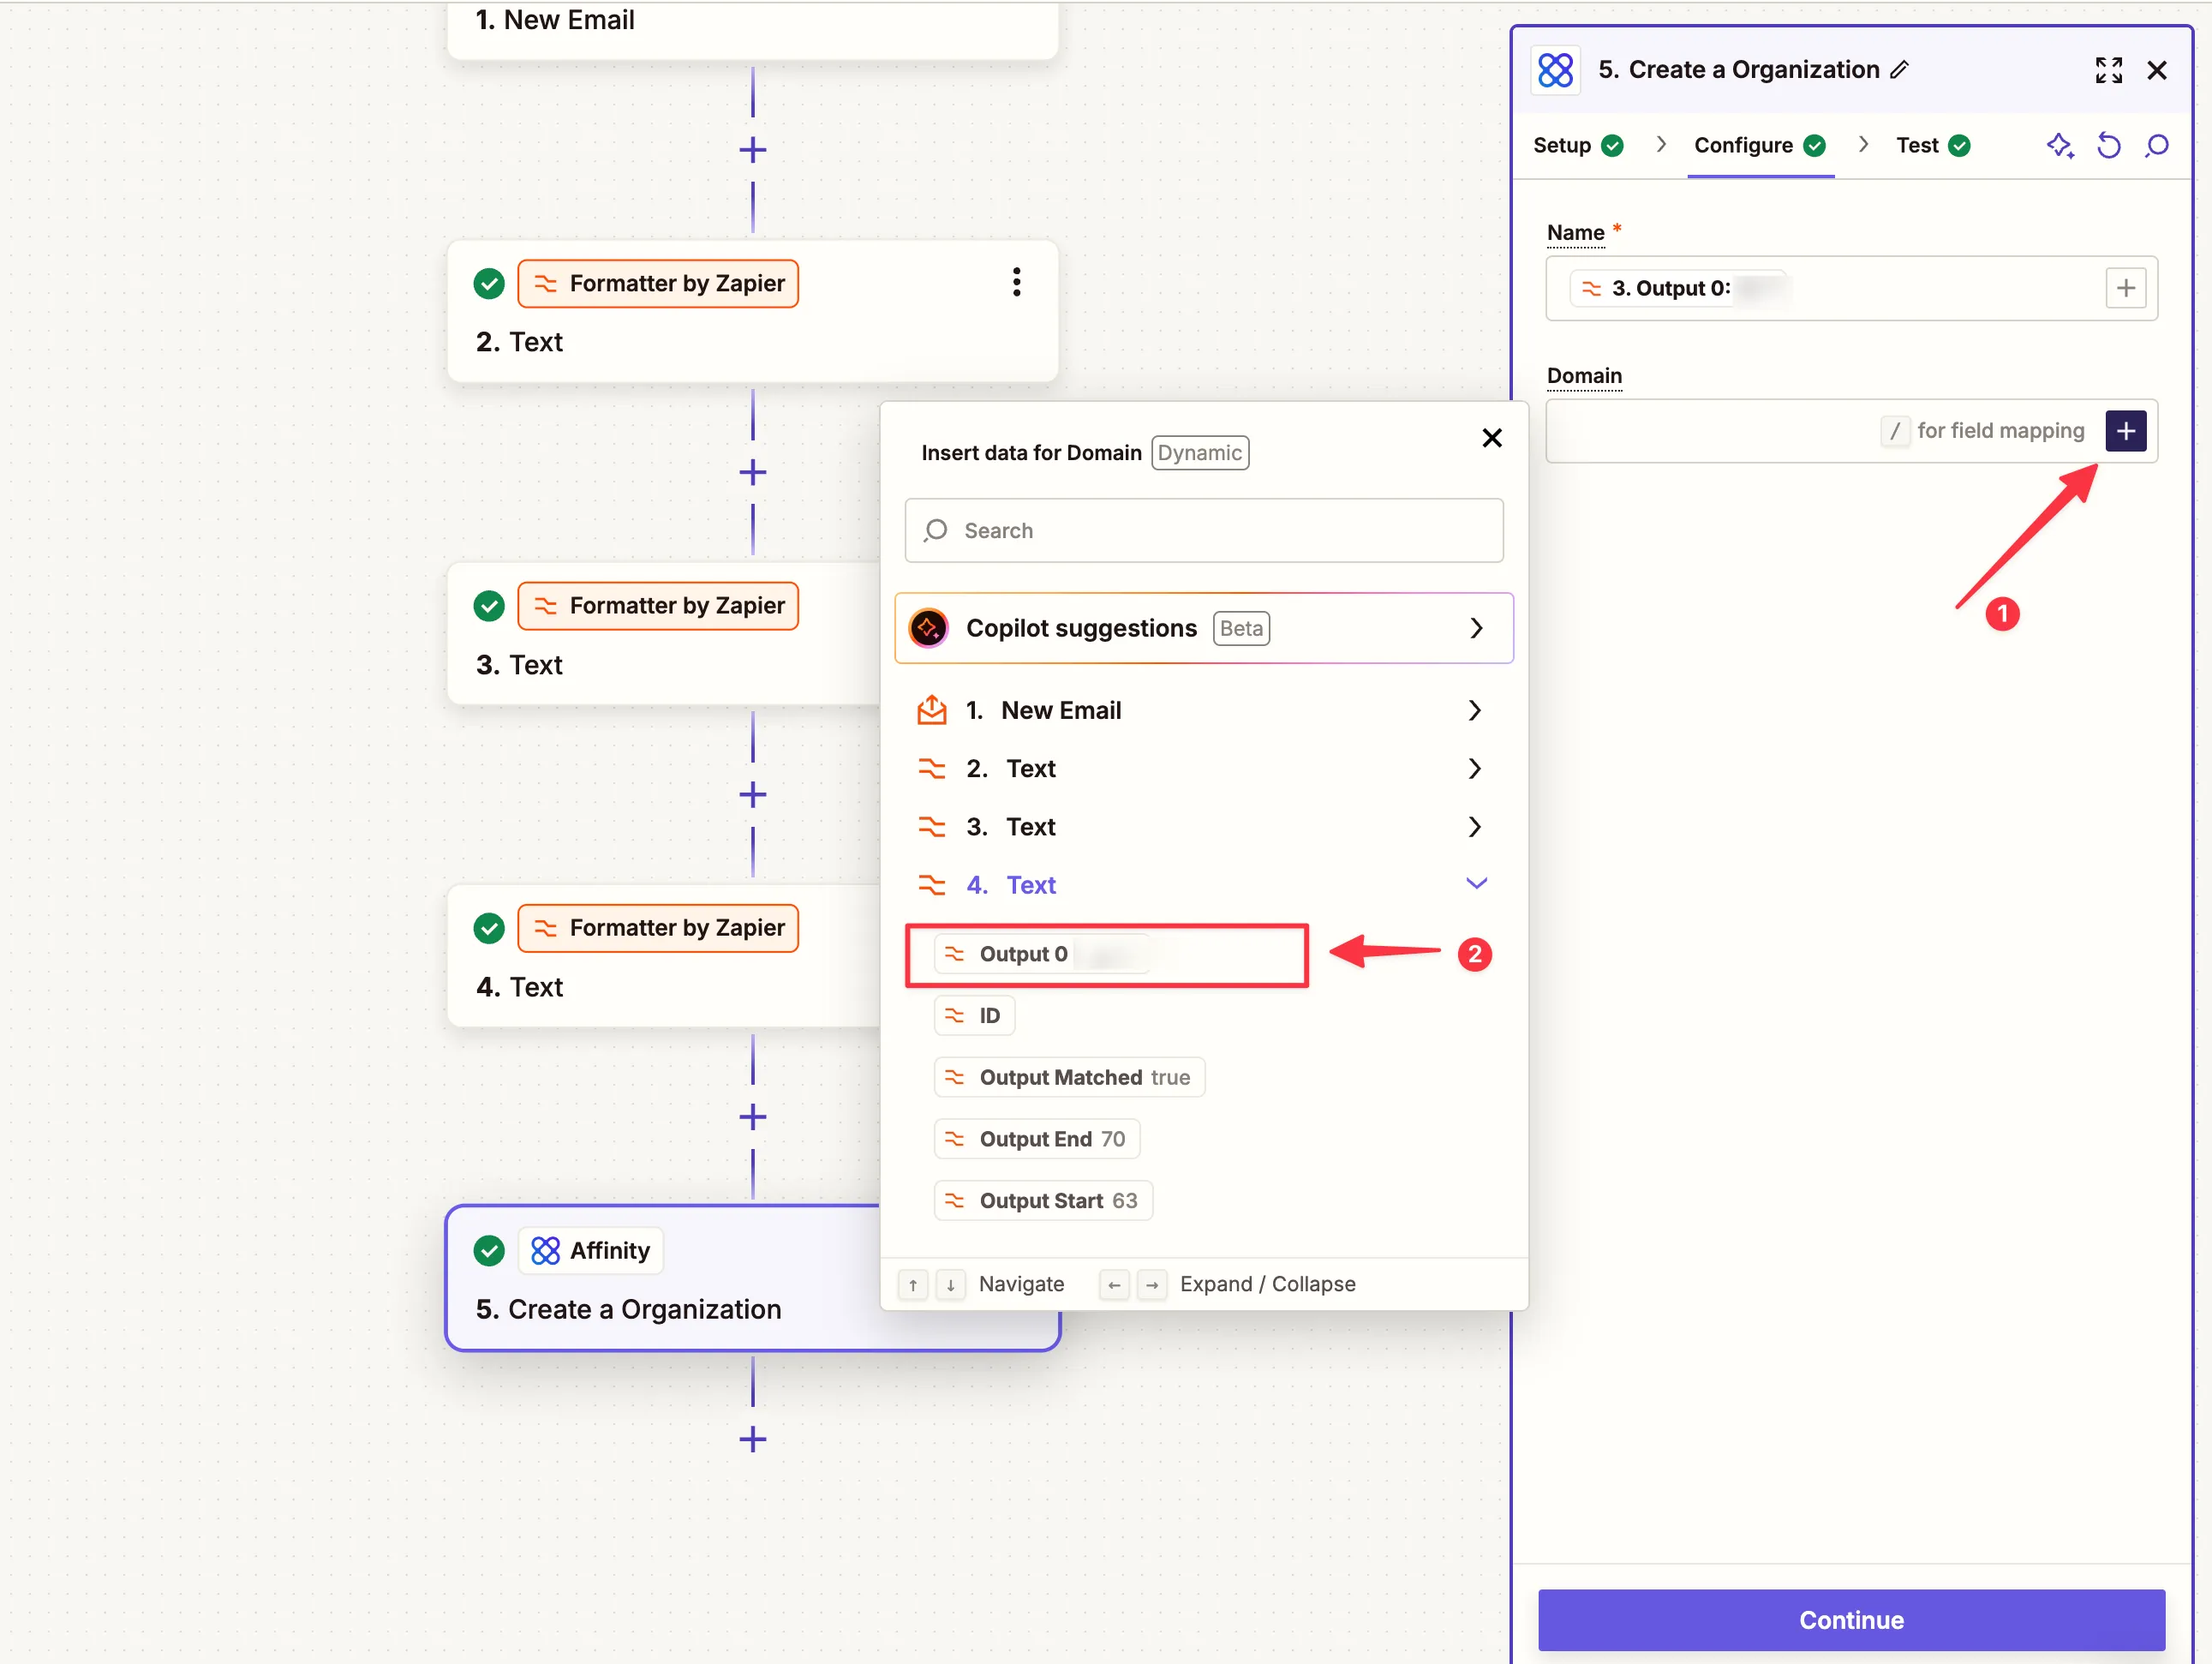
Add a “Find Organisation” Action
- Use the Find an Organisation event to check if the organisation already exists in Affinity.
-
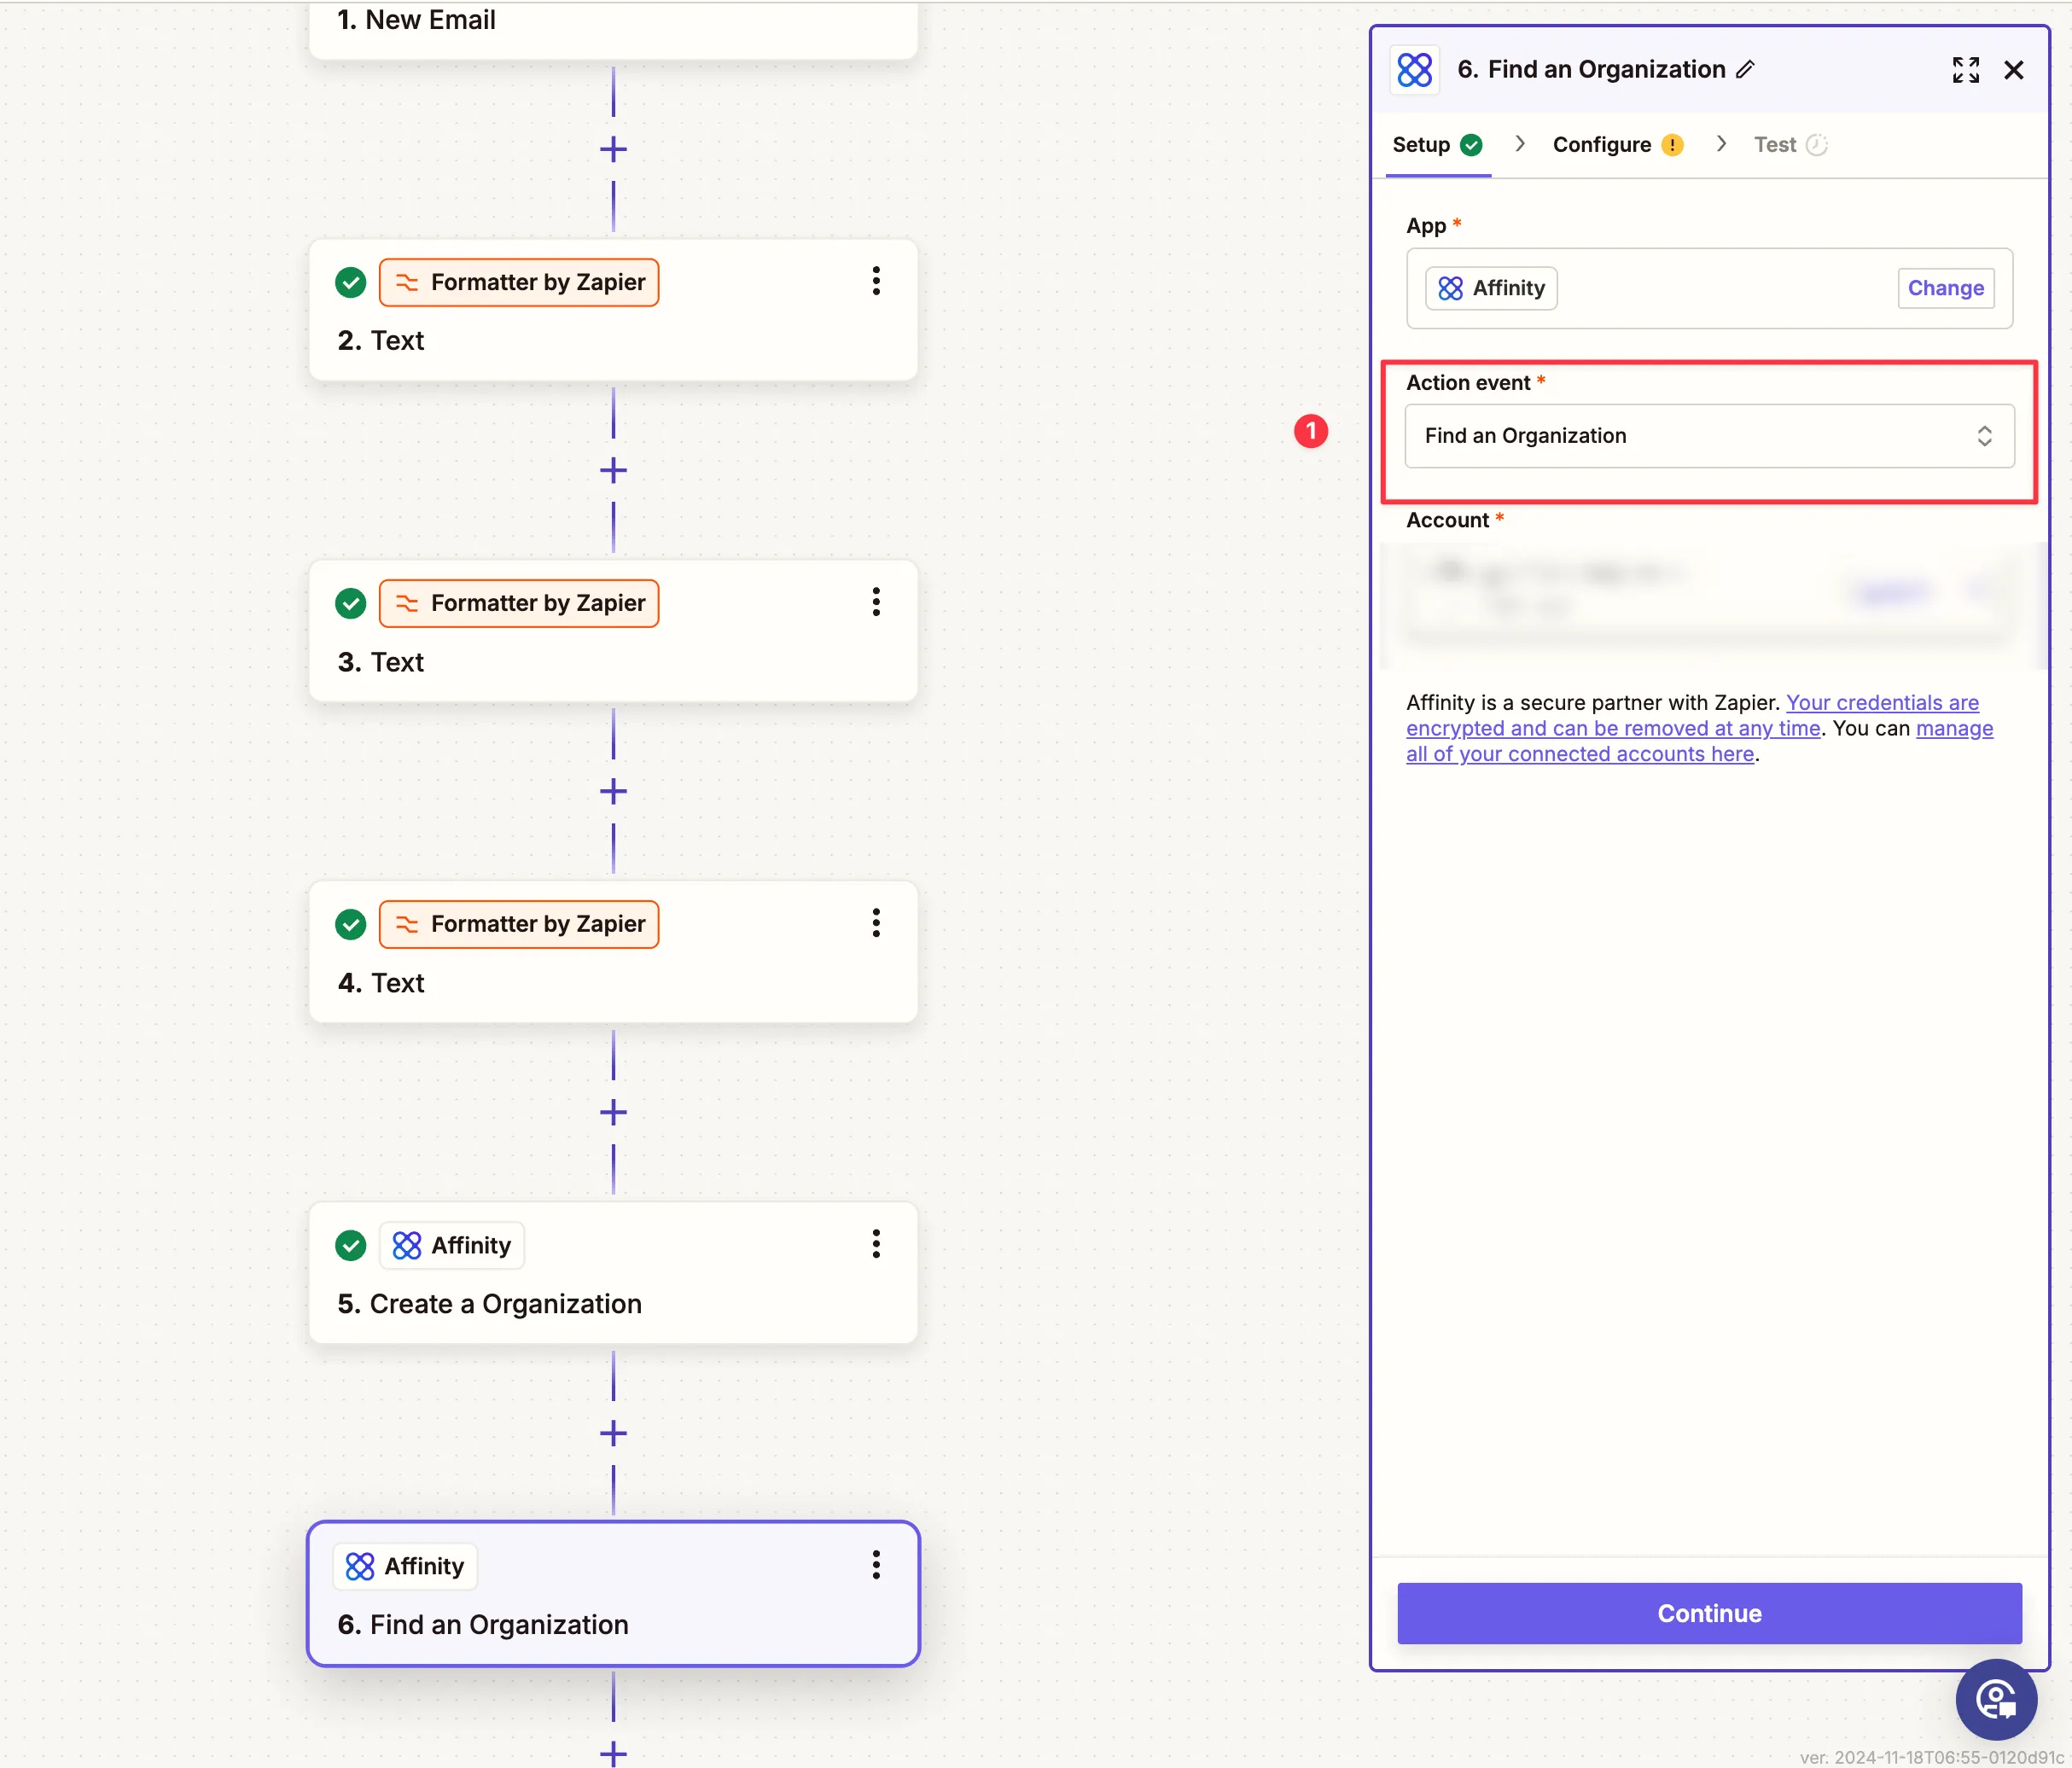
Handle Search Results
- Configure the automation to proceed only if no results are found, to avoid duplicates.
Step 7: Add to a Pipeline List
-
Add Organisations or Contacts to a List
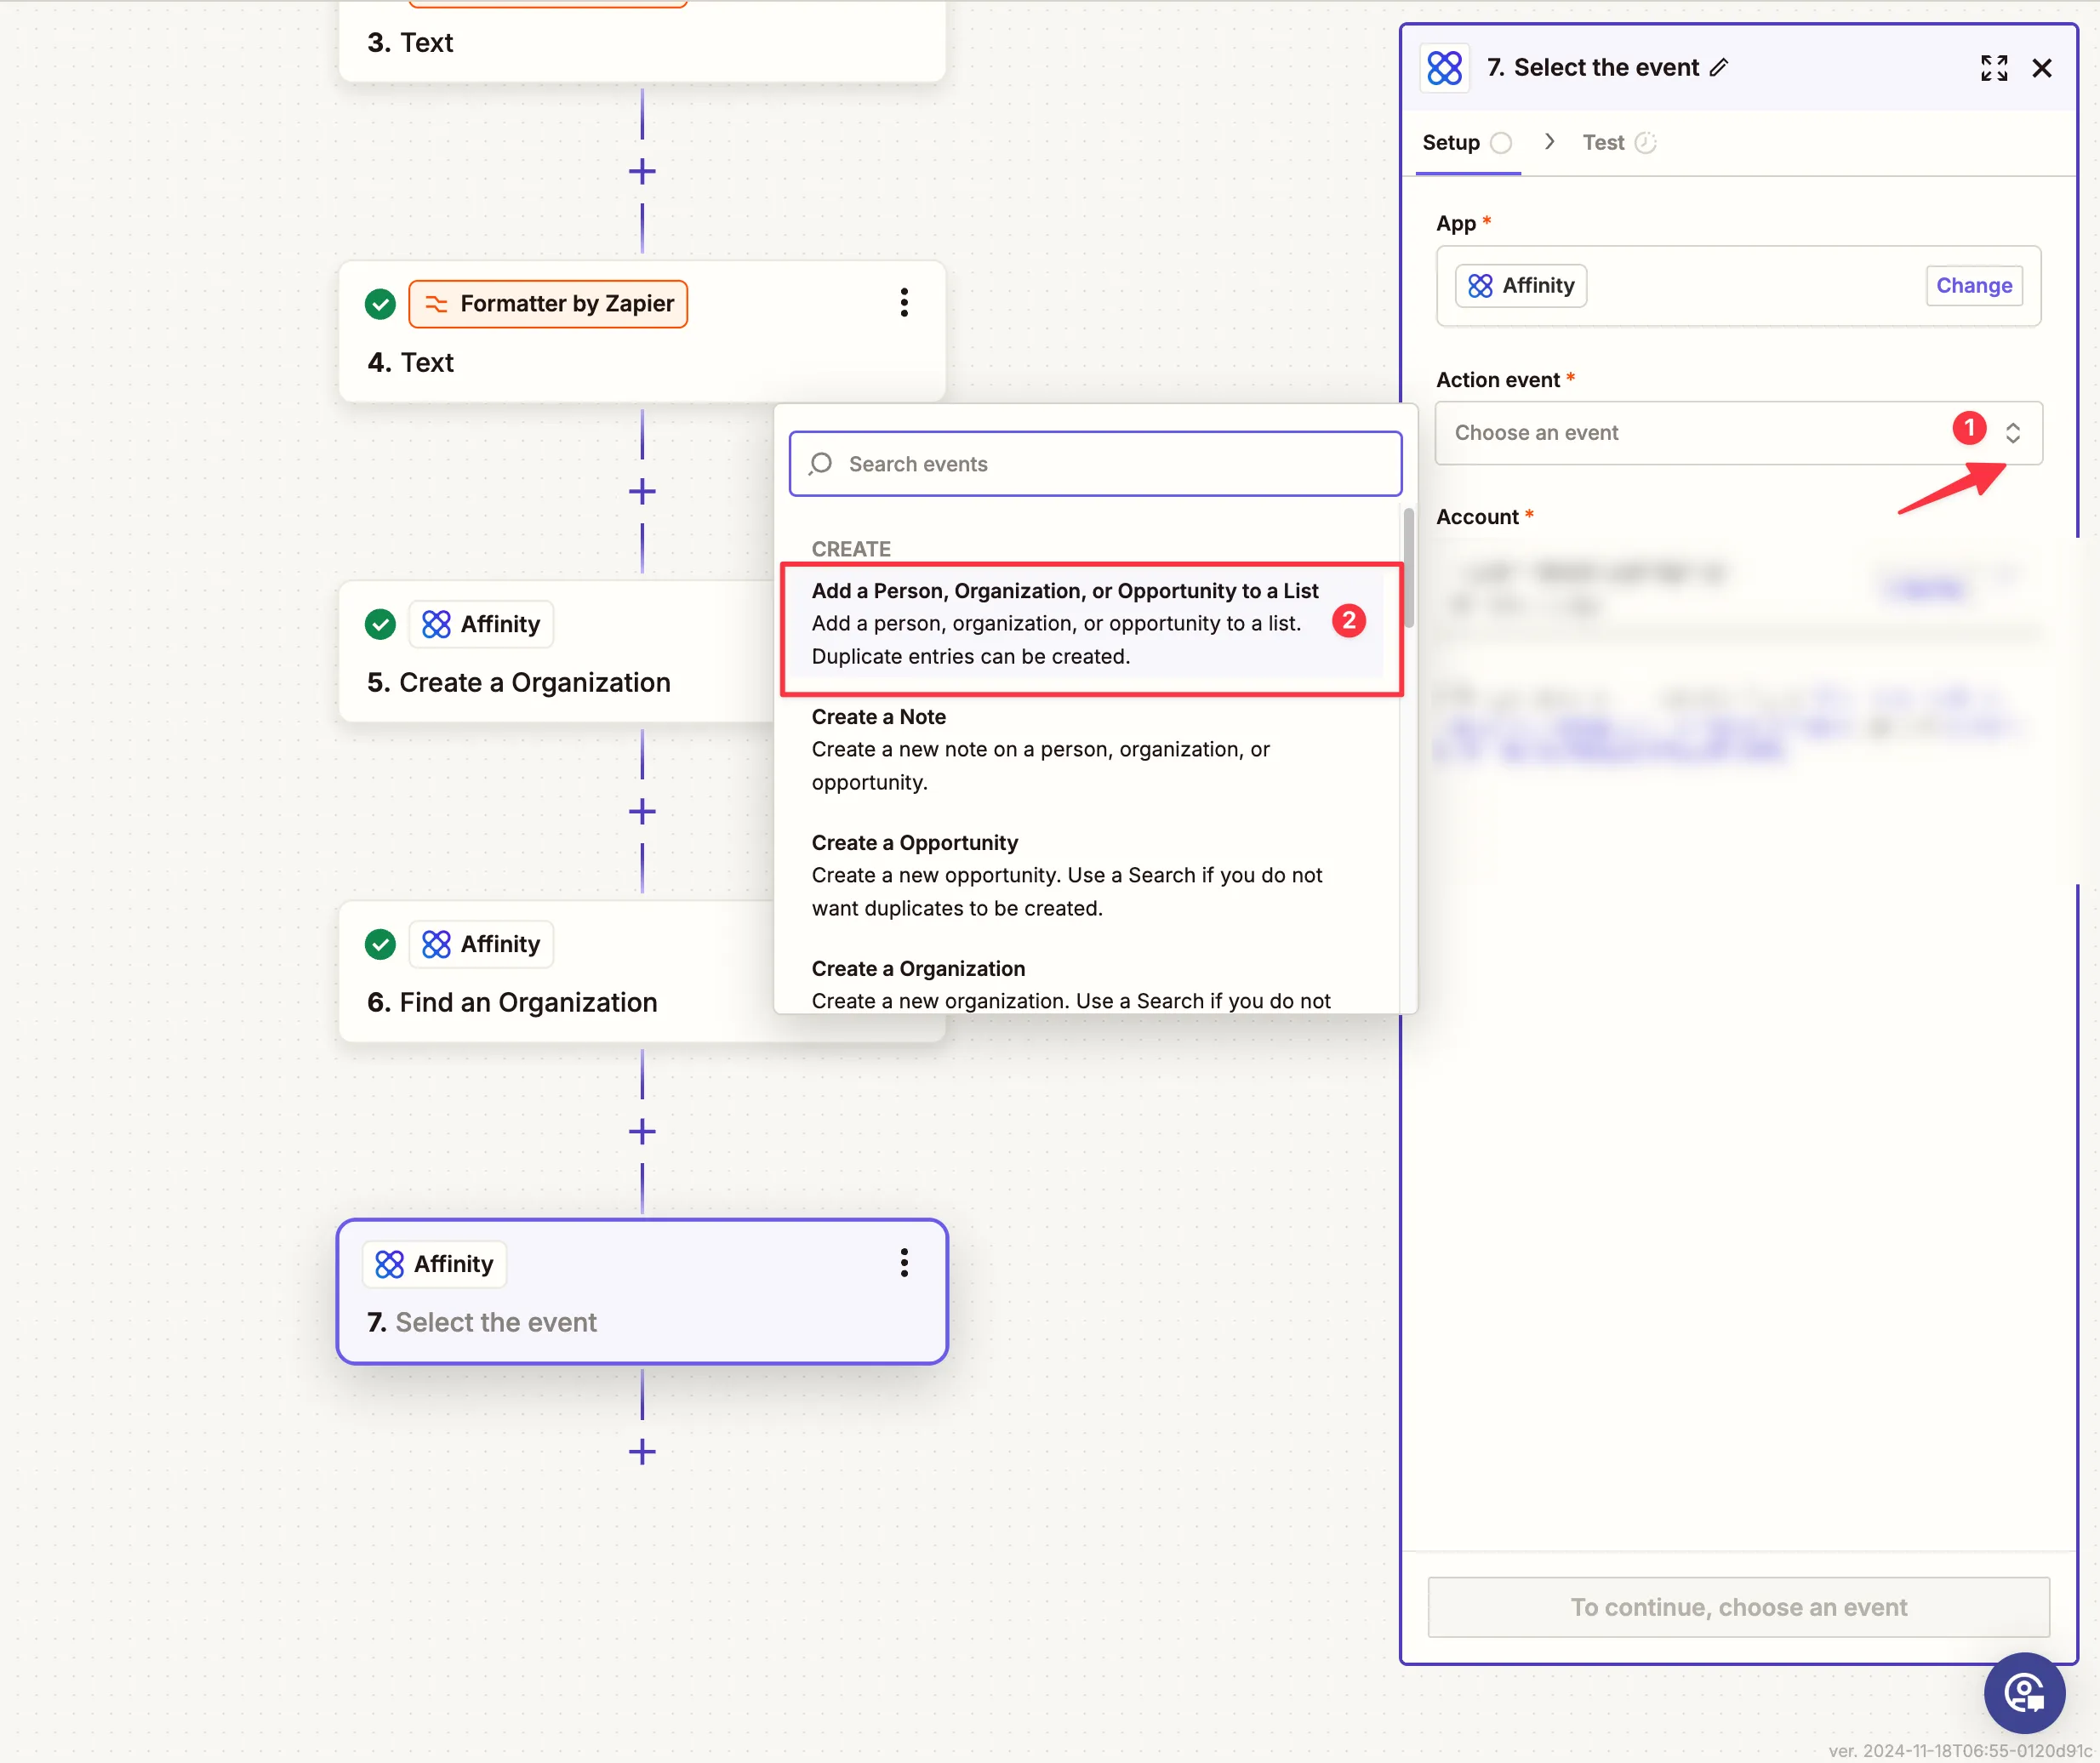
- Use the Add a Person, Organisation, or Opportunity to a List action.
-
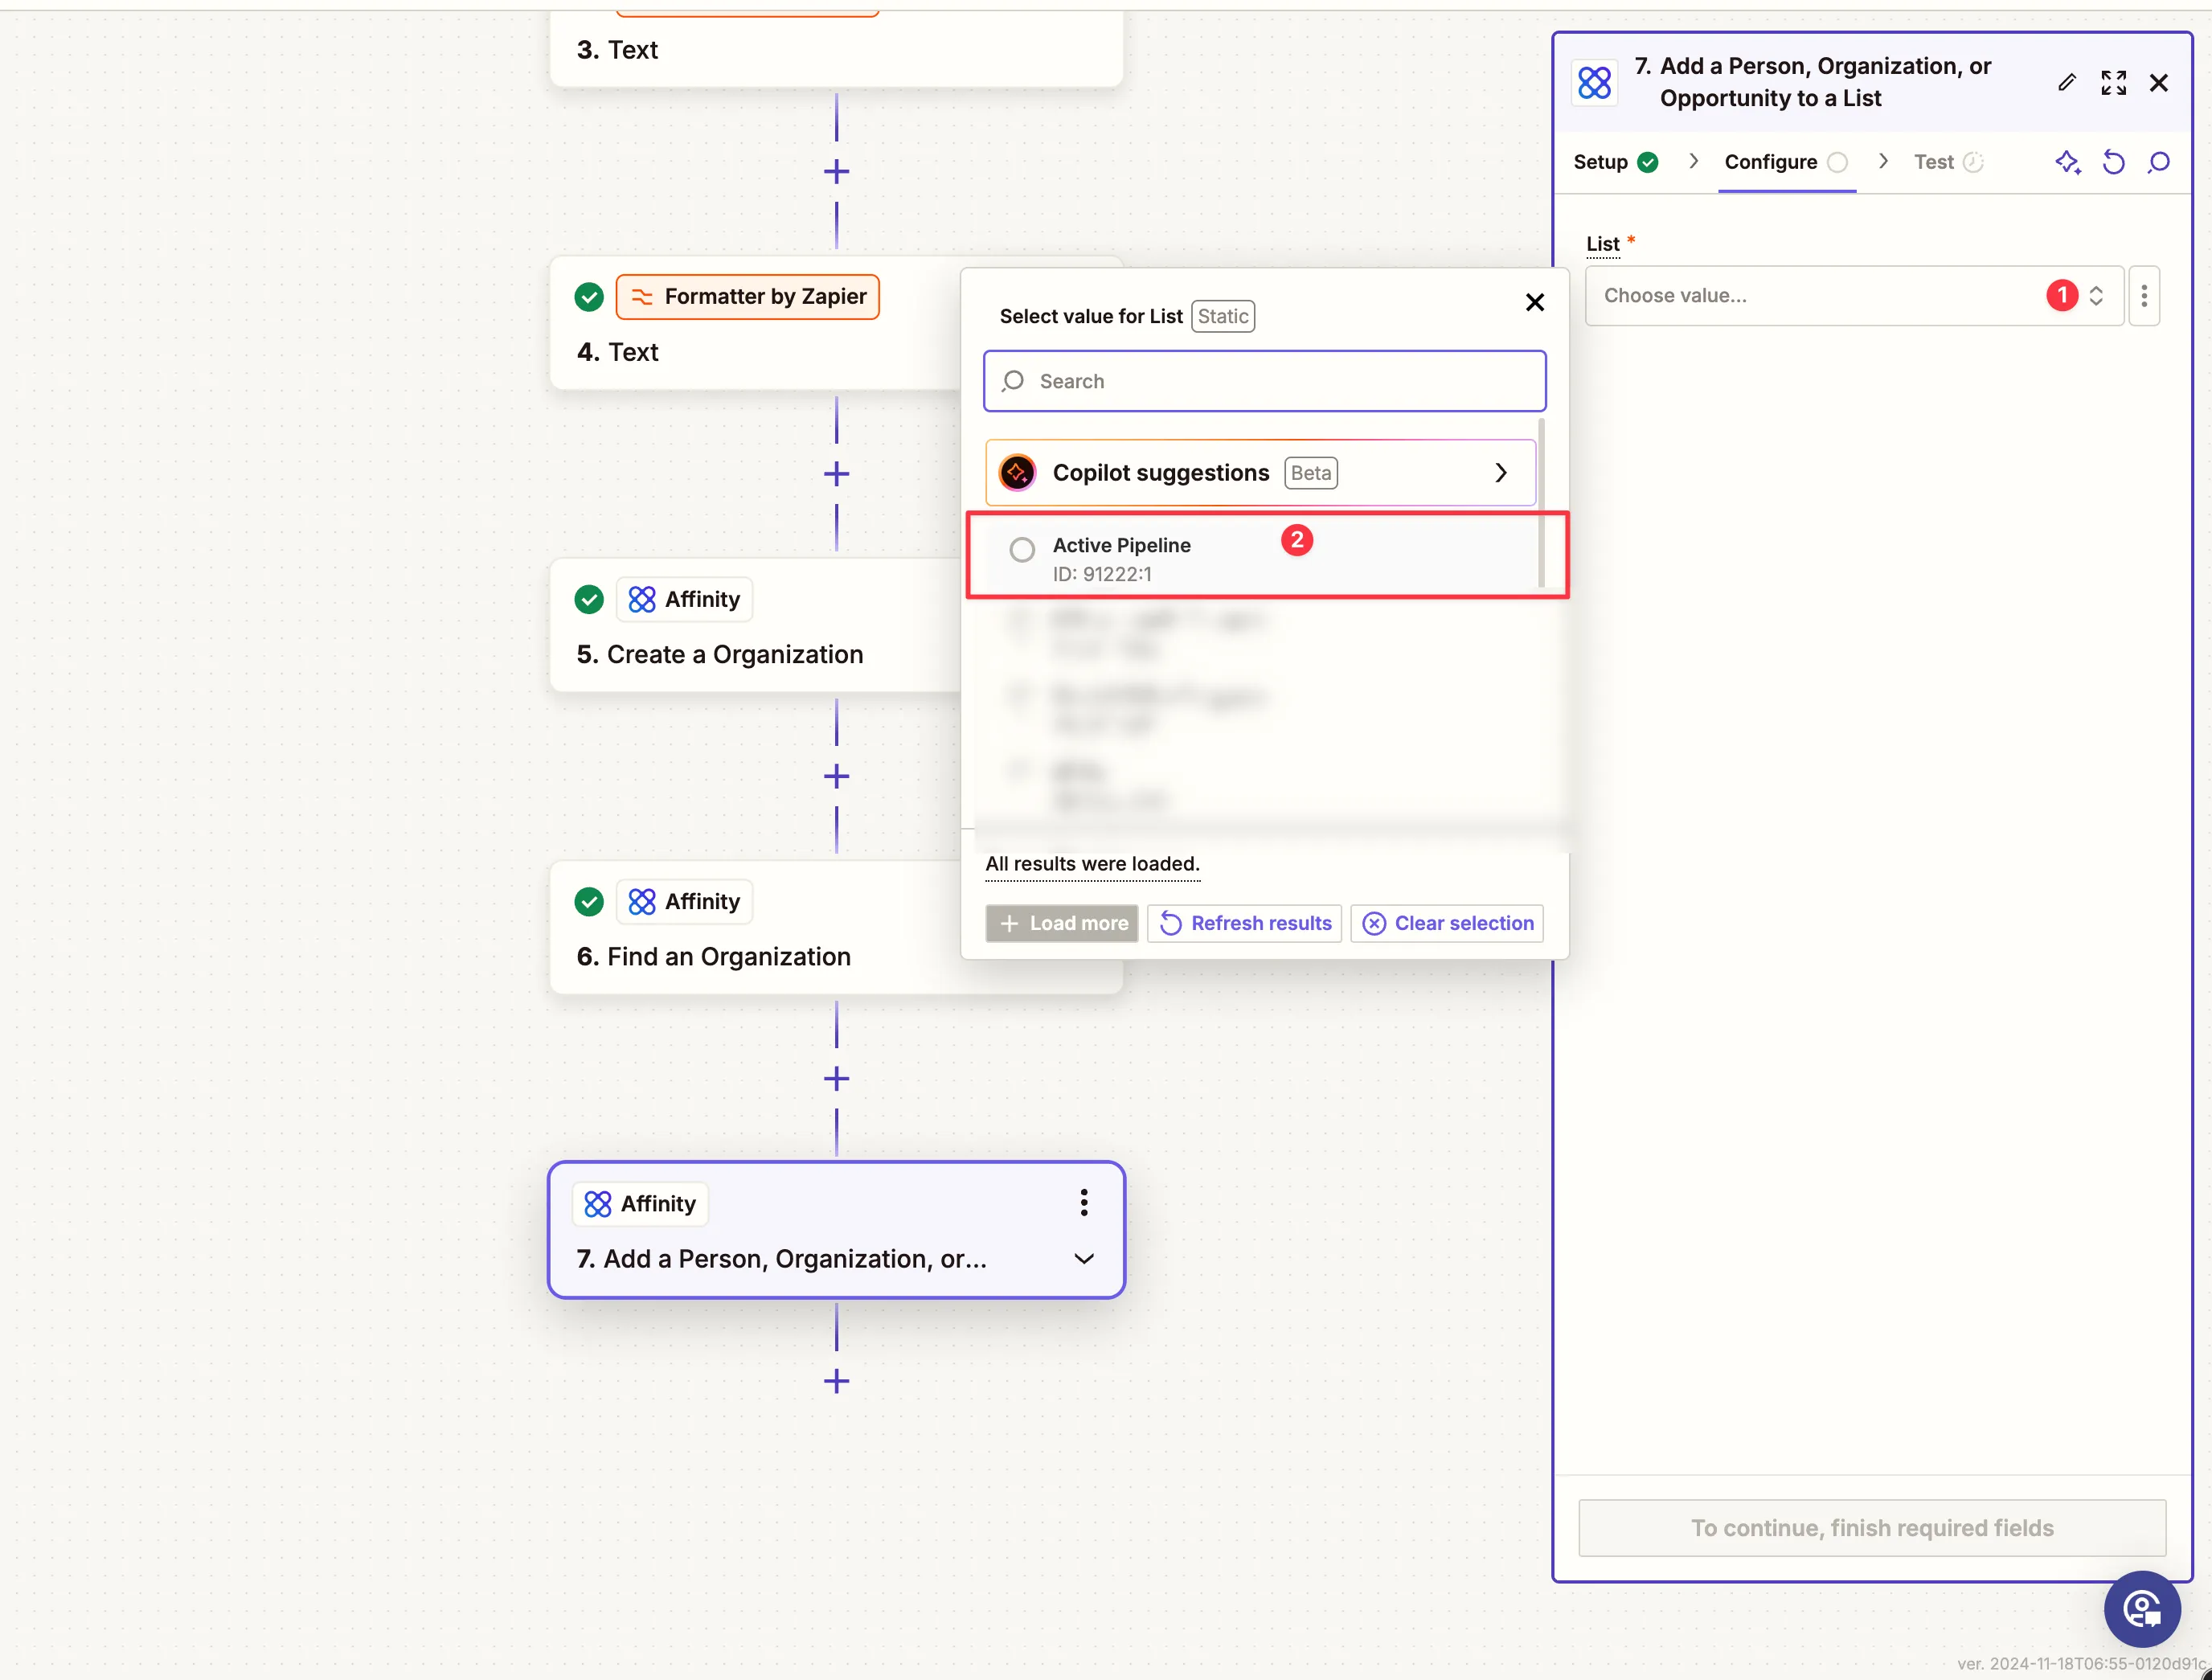
Configure the List Field
- Select the desired pipeline or list in Affinity for the new data.
- Map the data dynamically from previous steps.
-
Test the Pipeline Update
- Test the step to confirm the organisation is correctly added to the specified list.
Adding Organisations to a Pipeline with Dynamic Data
-
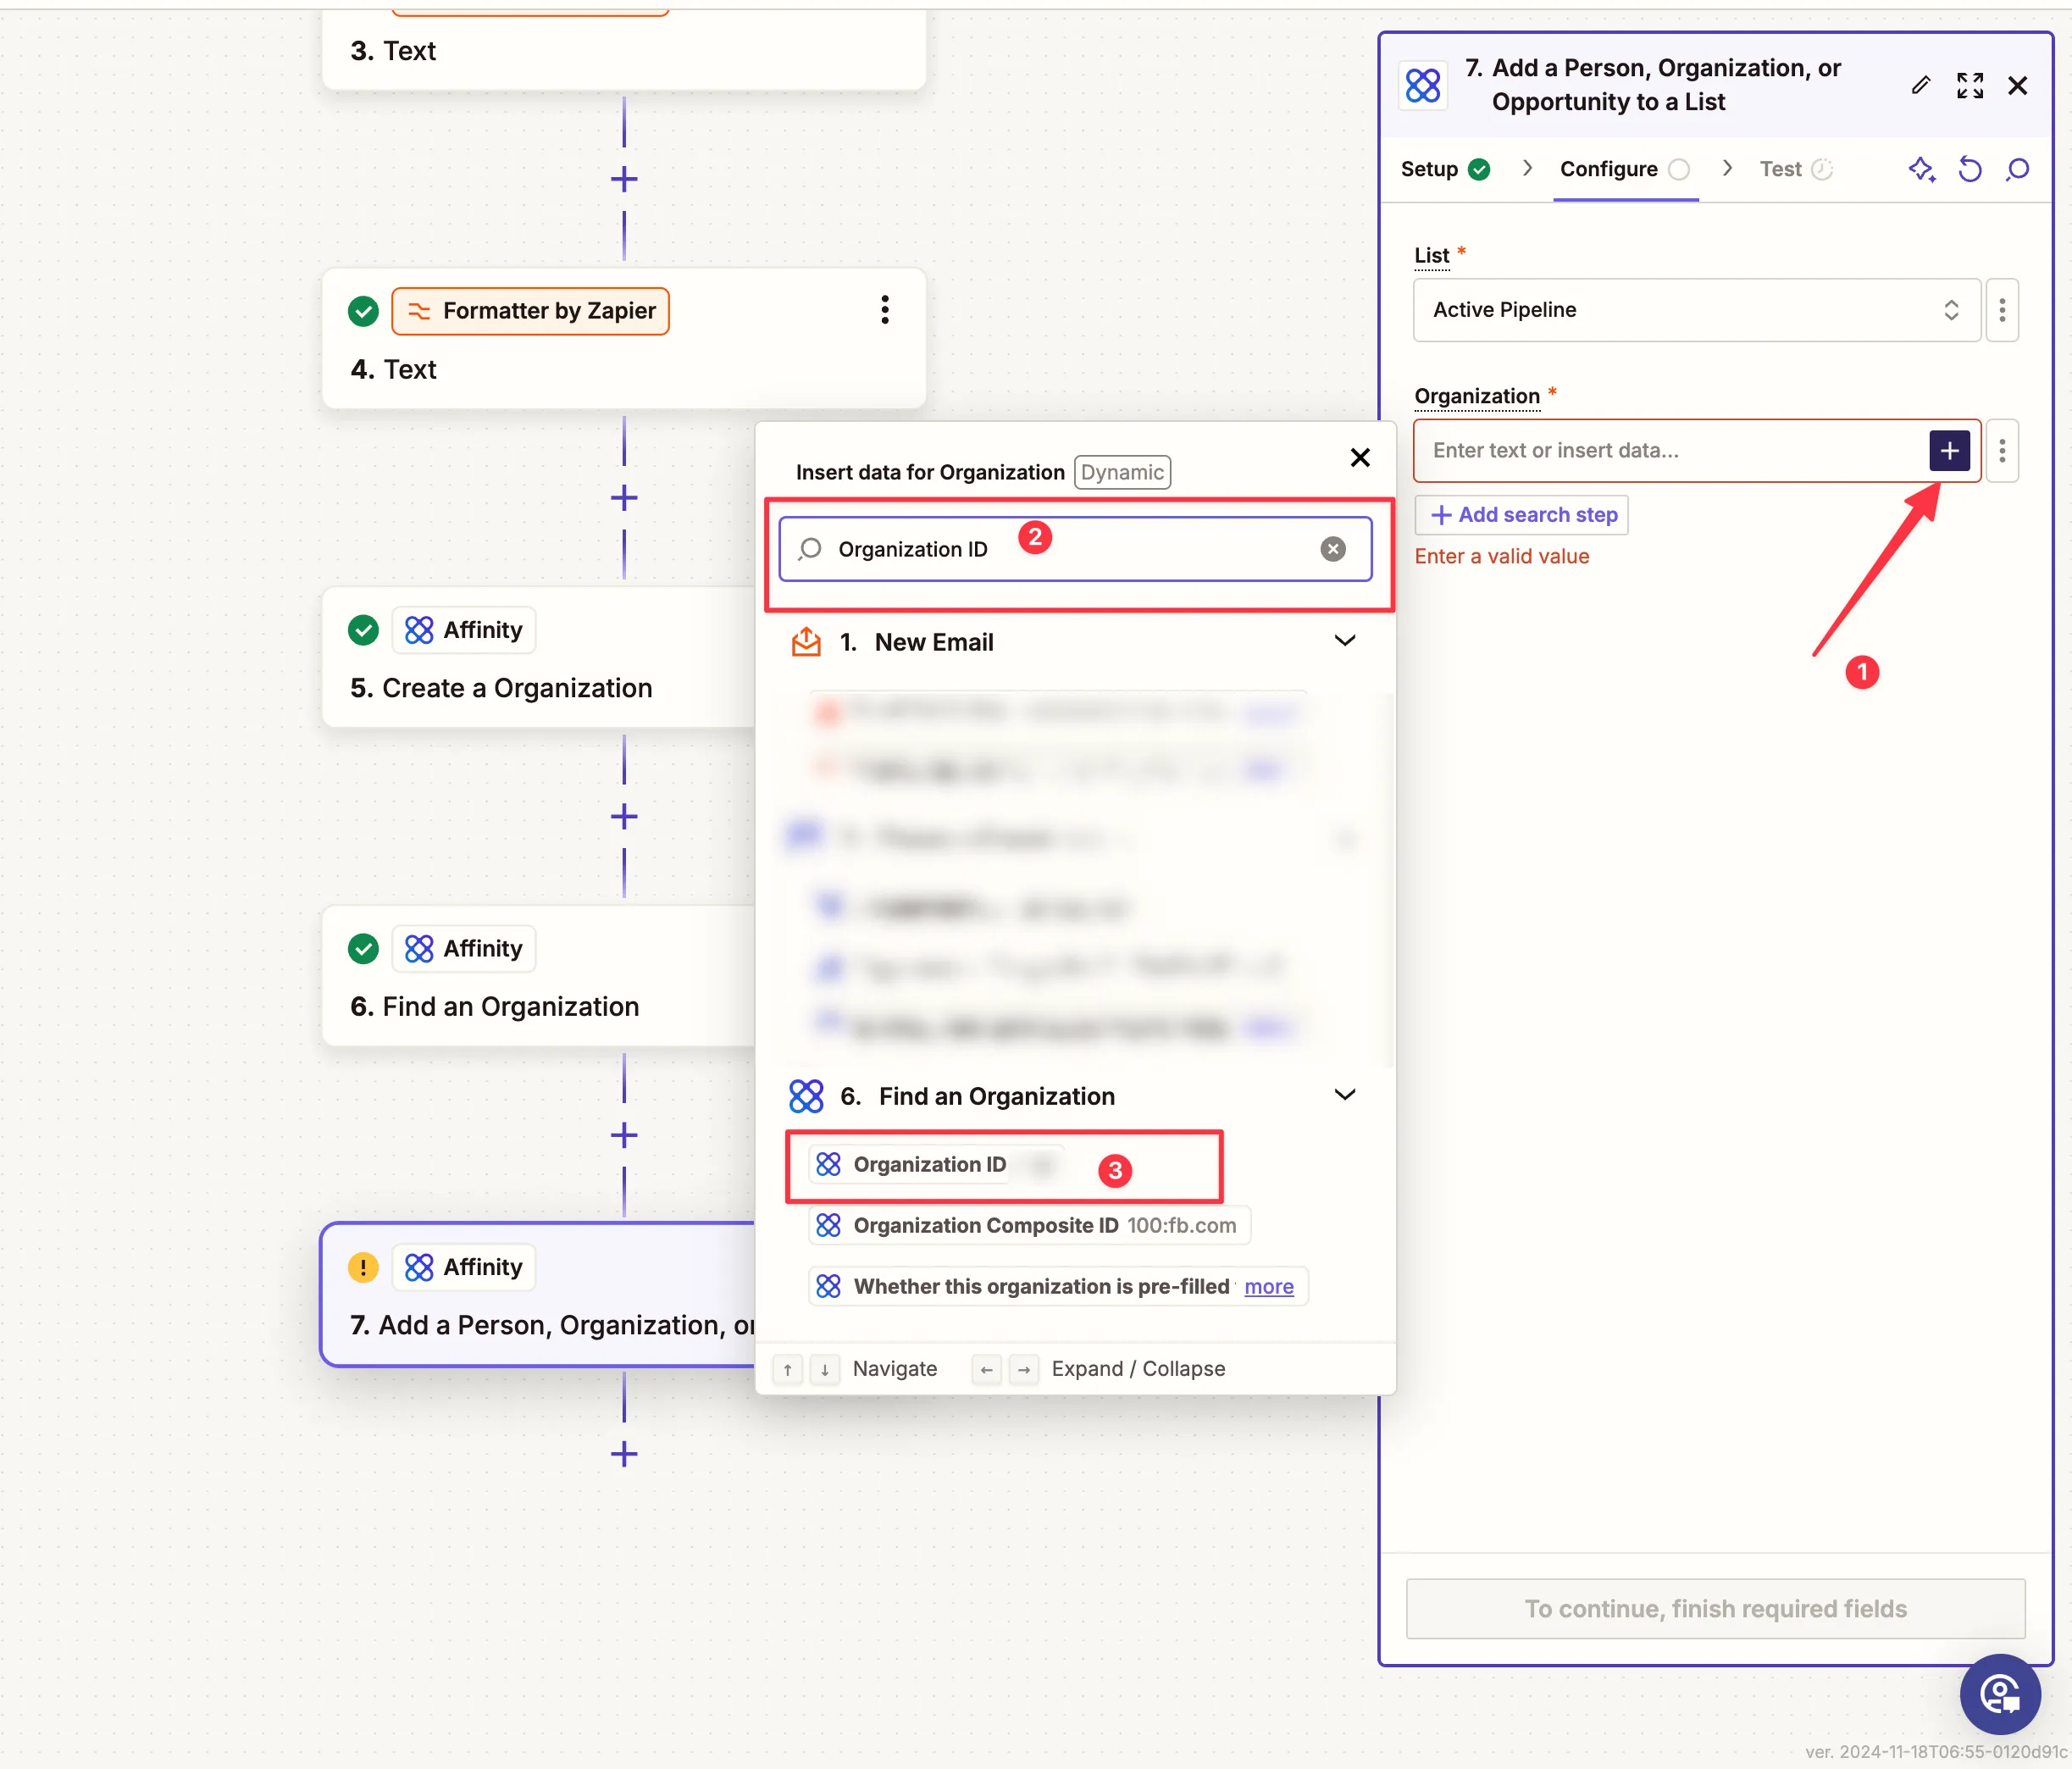
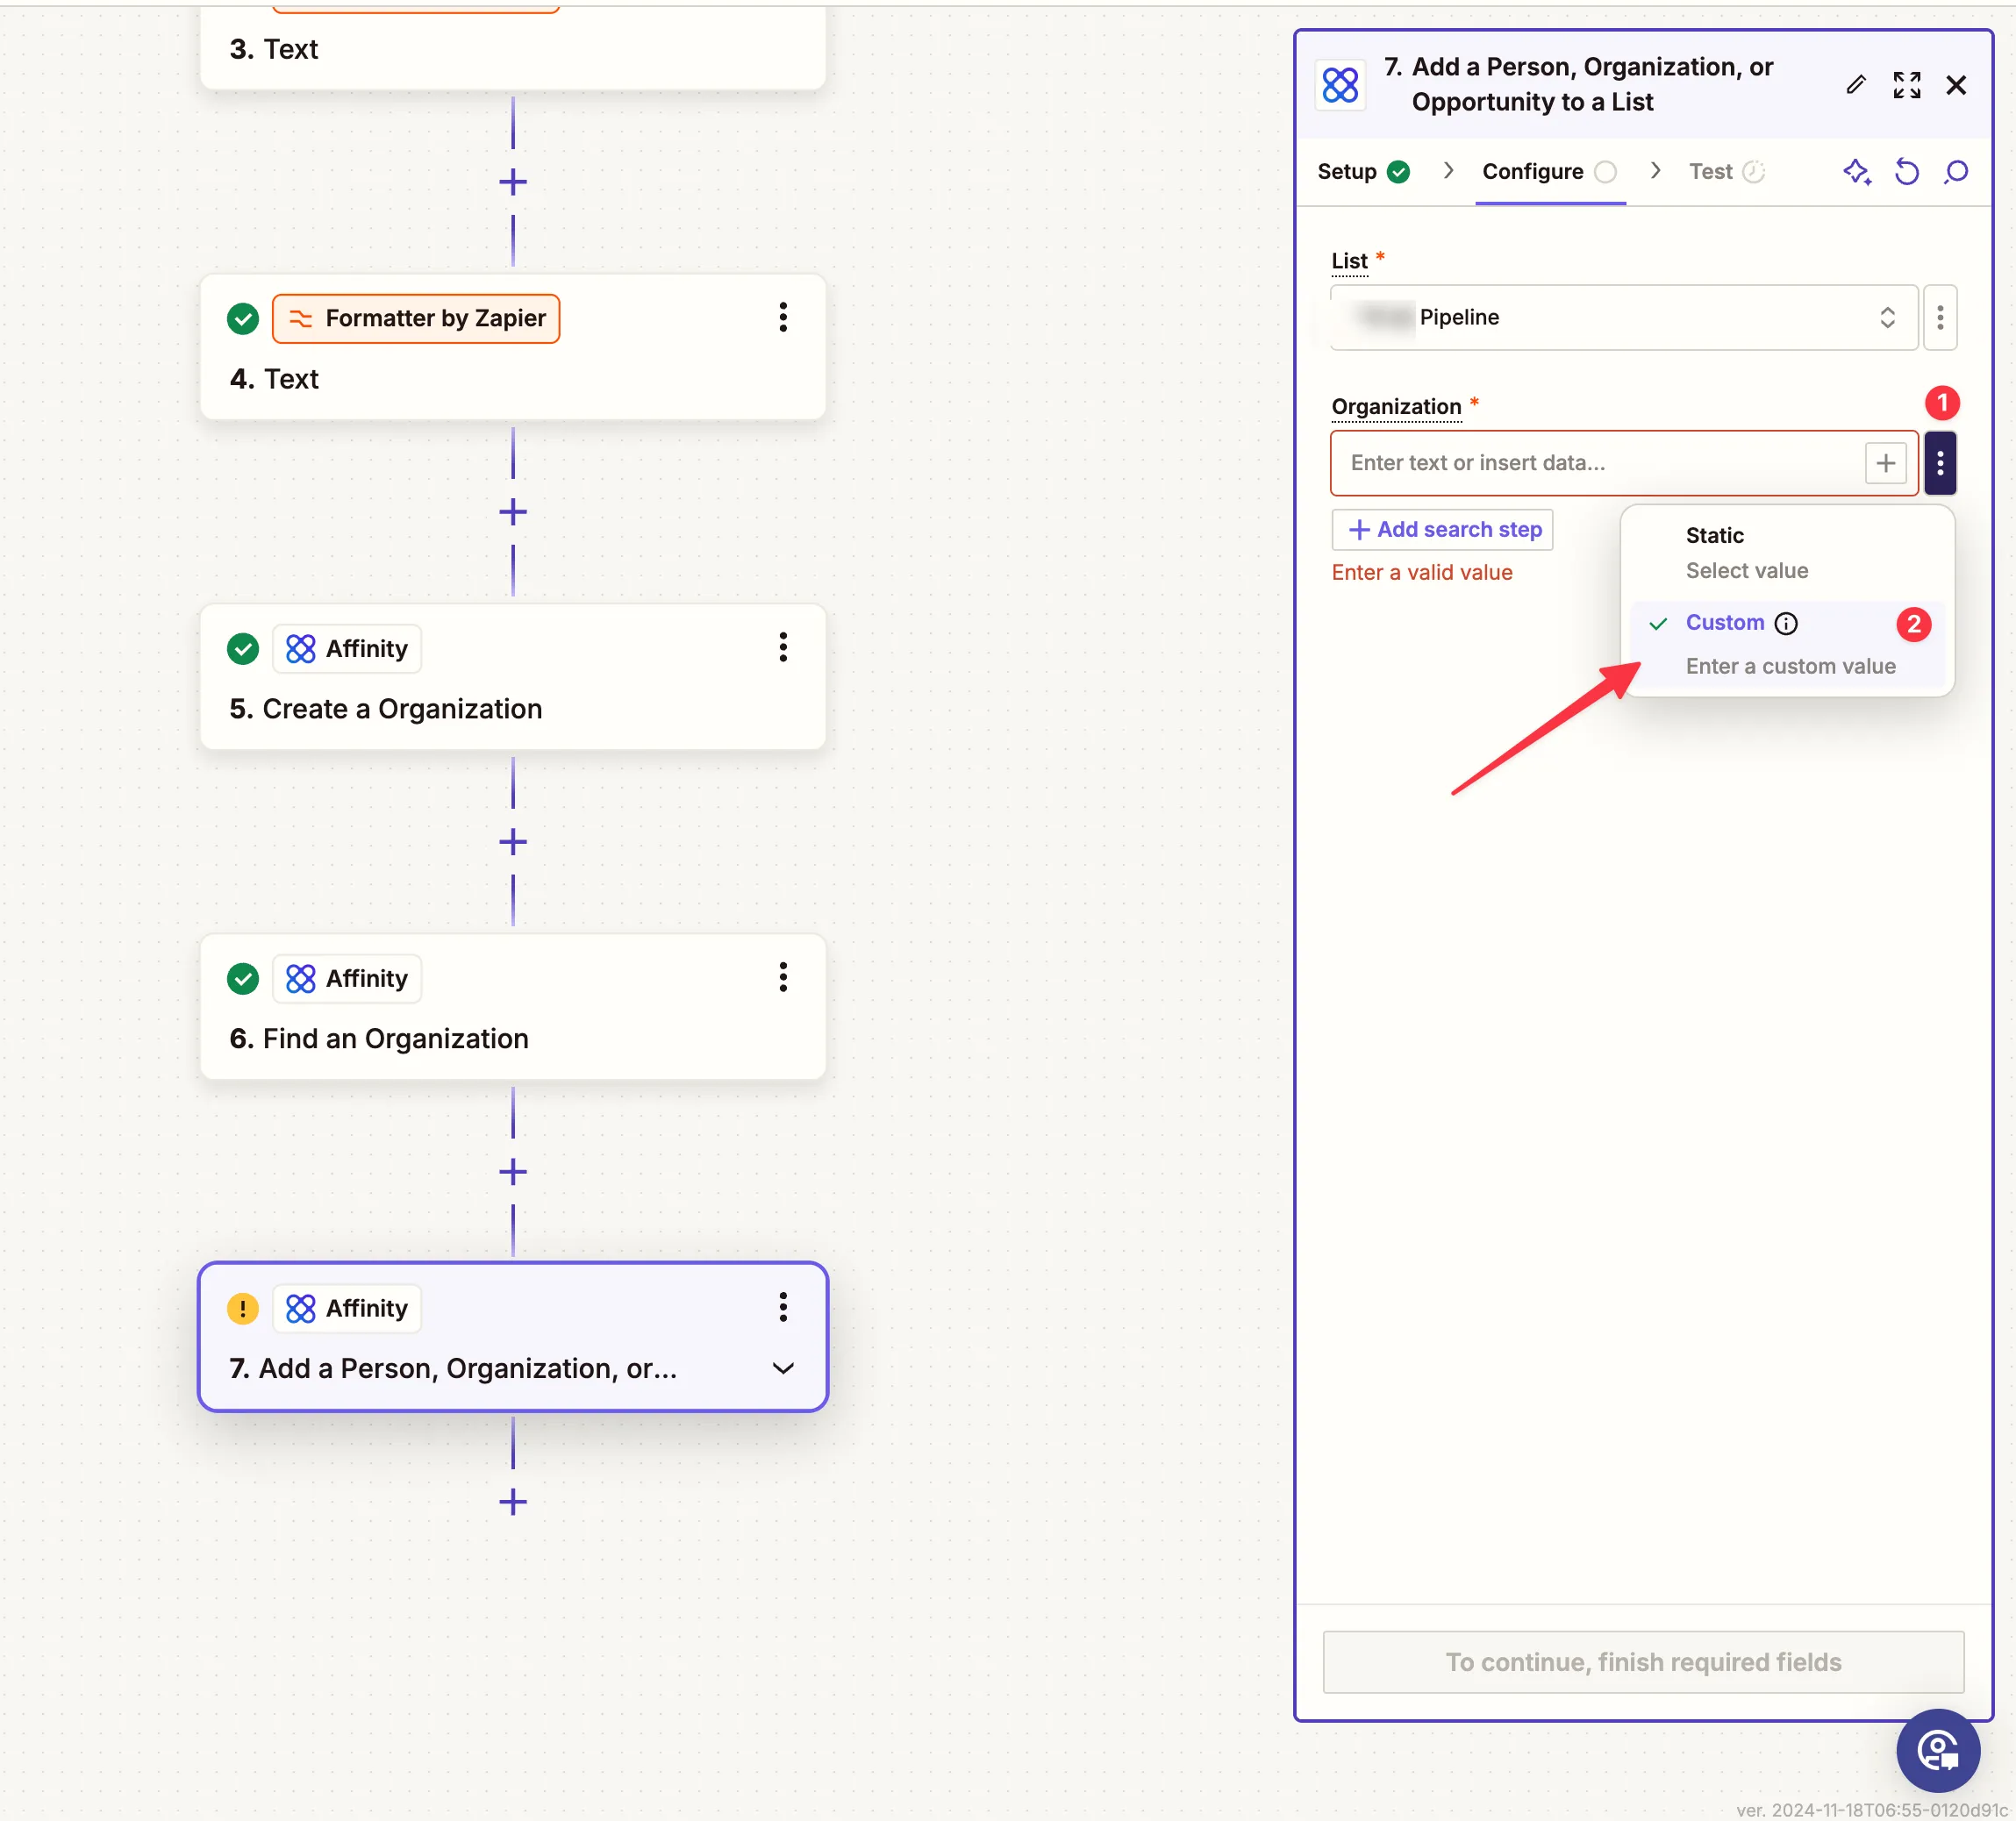
Map the Organisation Field Dynamically
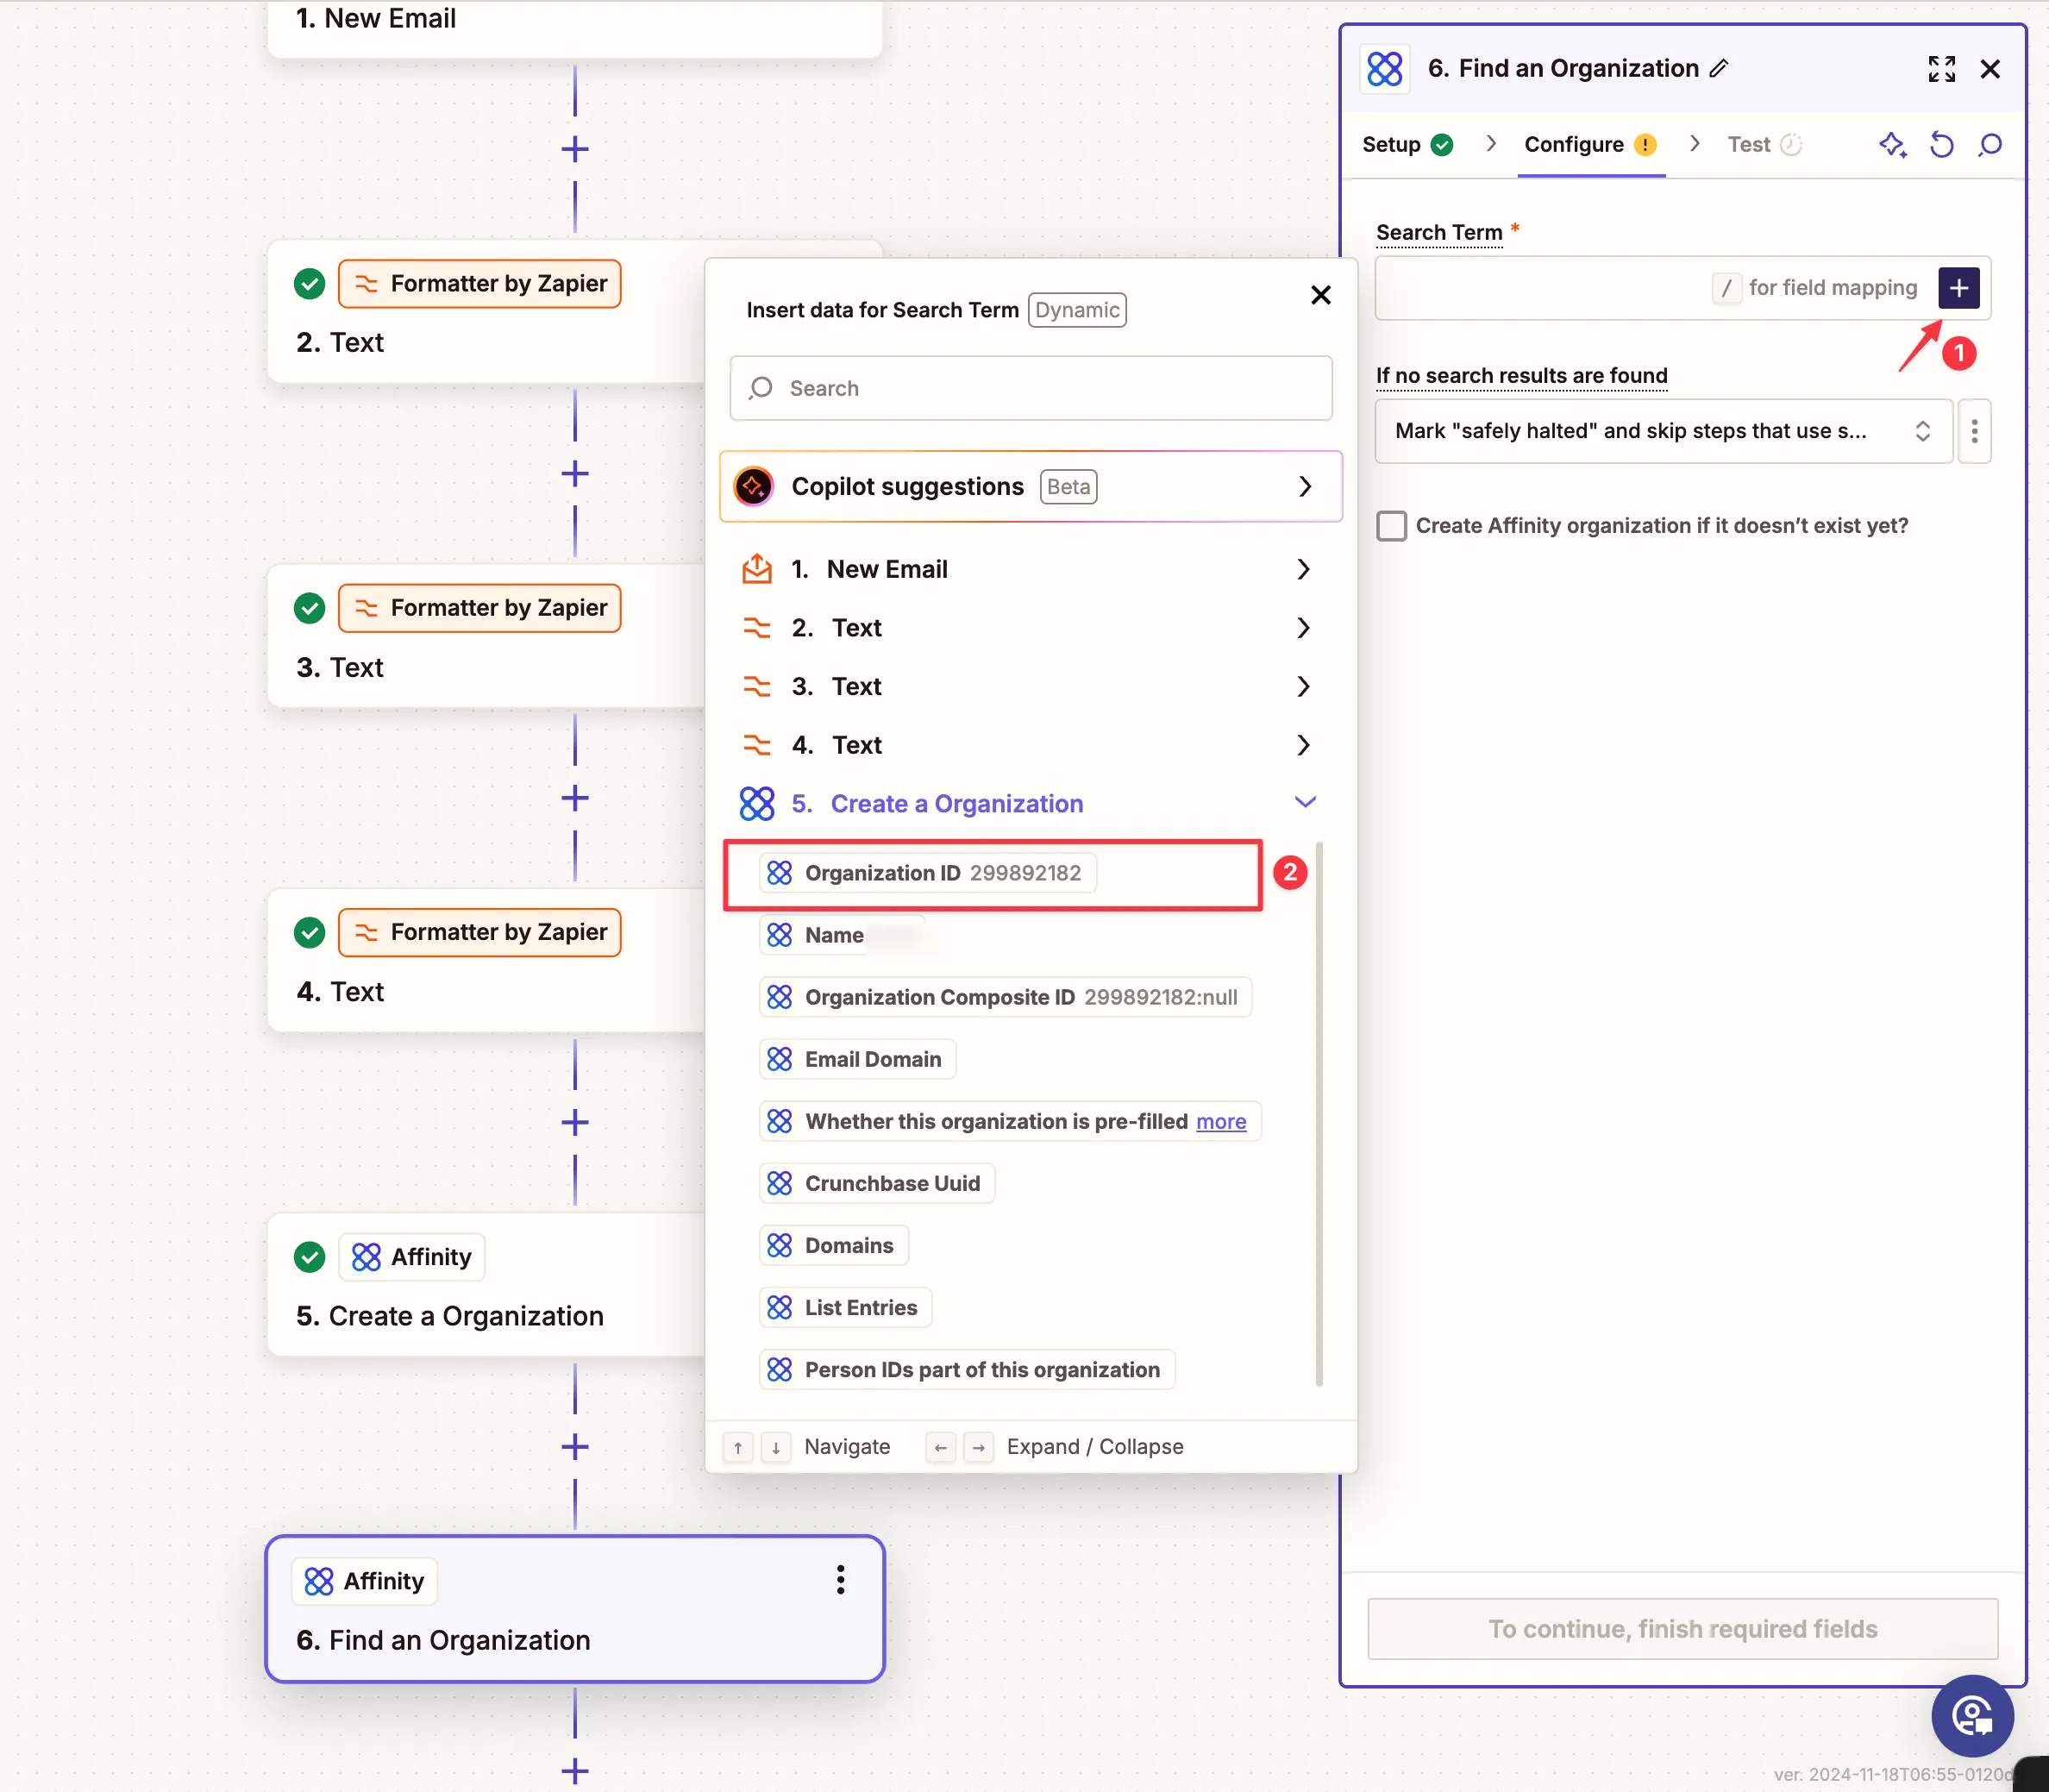
- In the Add a Person, Organisation, or Opportunity to a List action, click the Organisation field.
- Use dynamic data from the previous steps, such as the Organisation ID retrieved from the Find an Organisation step.
-
Test and Validate
- Test this step to ensure the correct organisation is being added to the selected pipeline in Affinity.
Finalising the Automation
-
Test the Entire Workflow
- Perform a full test run from email parsing to updating Affinity to ensure all steps are functioning as intended.
-
Publish the Zap
- Once everything works correctly, publish your Zap and start using the automation.
This automation ensures that emails forwarded by your VC team are seamlessly captured and organised in Affinity, saving time and improving workflow accuracy.